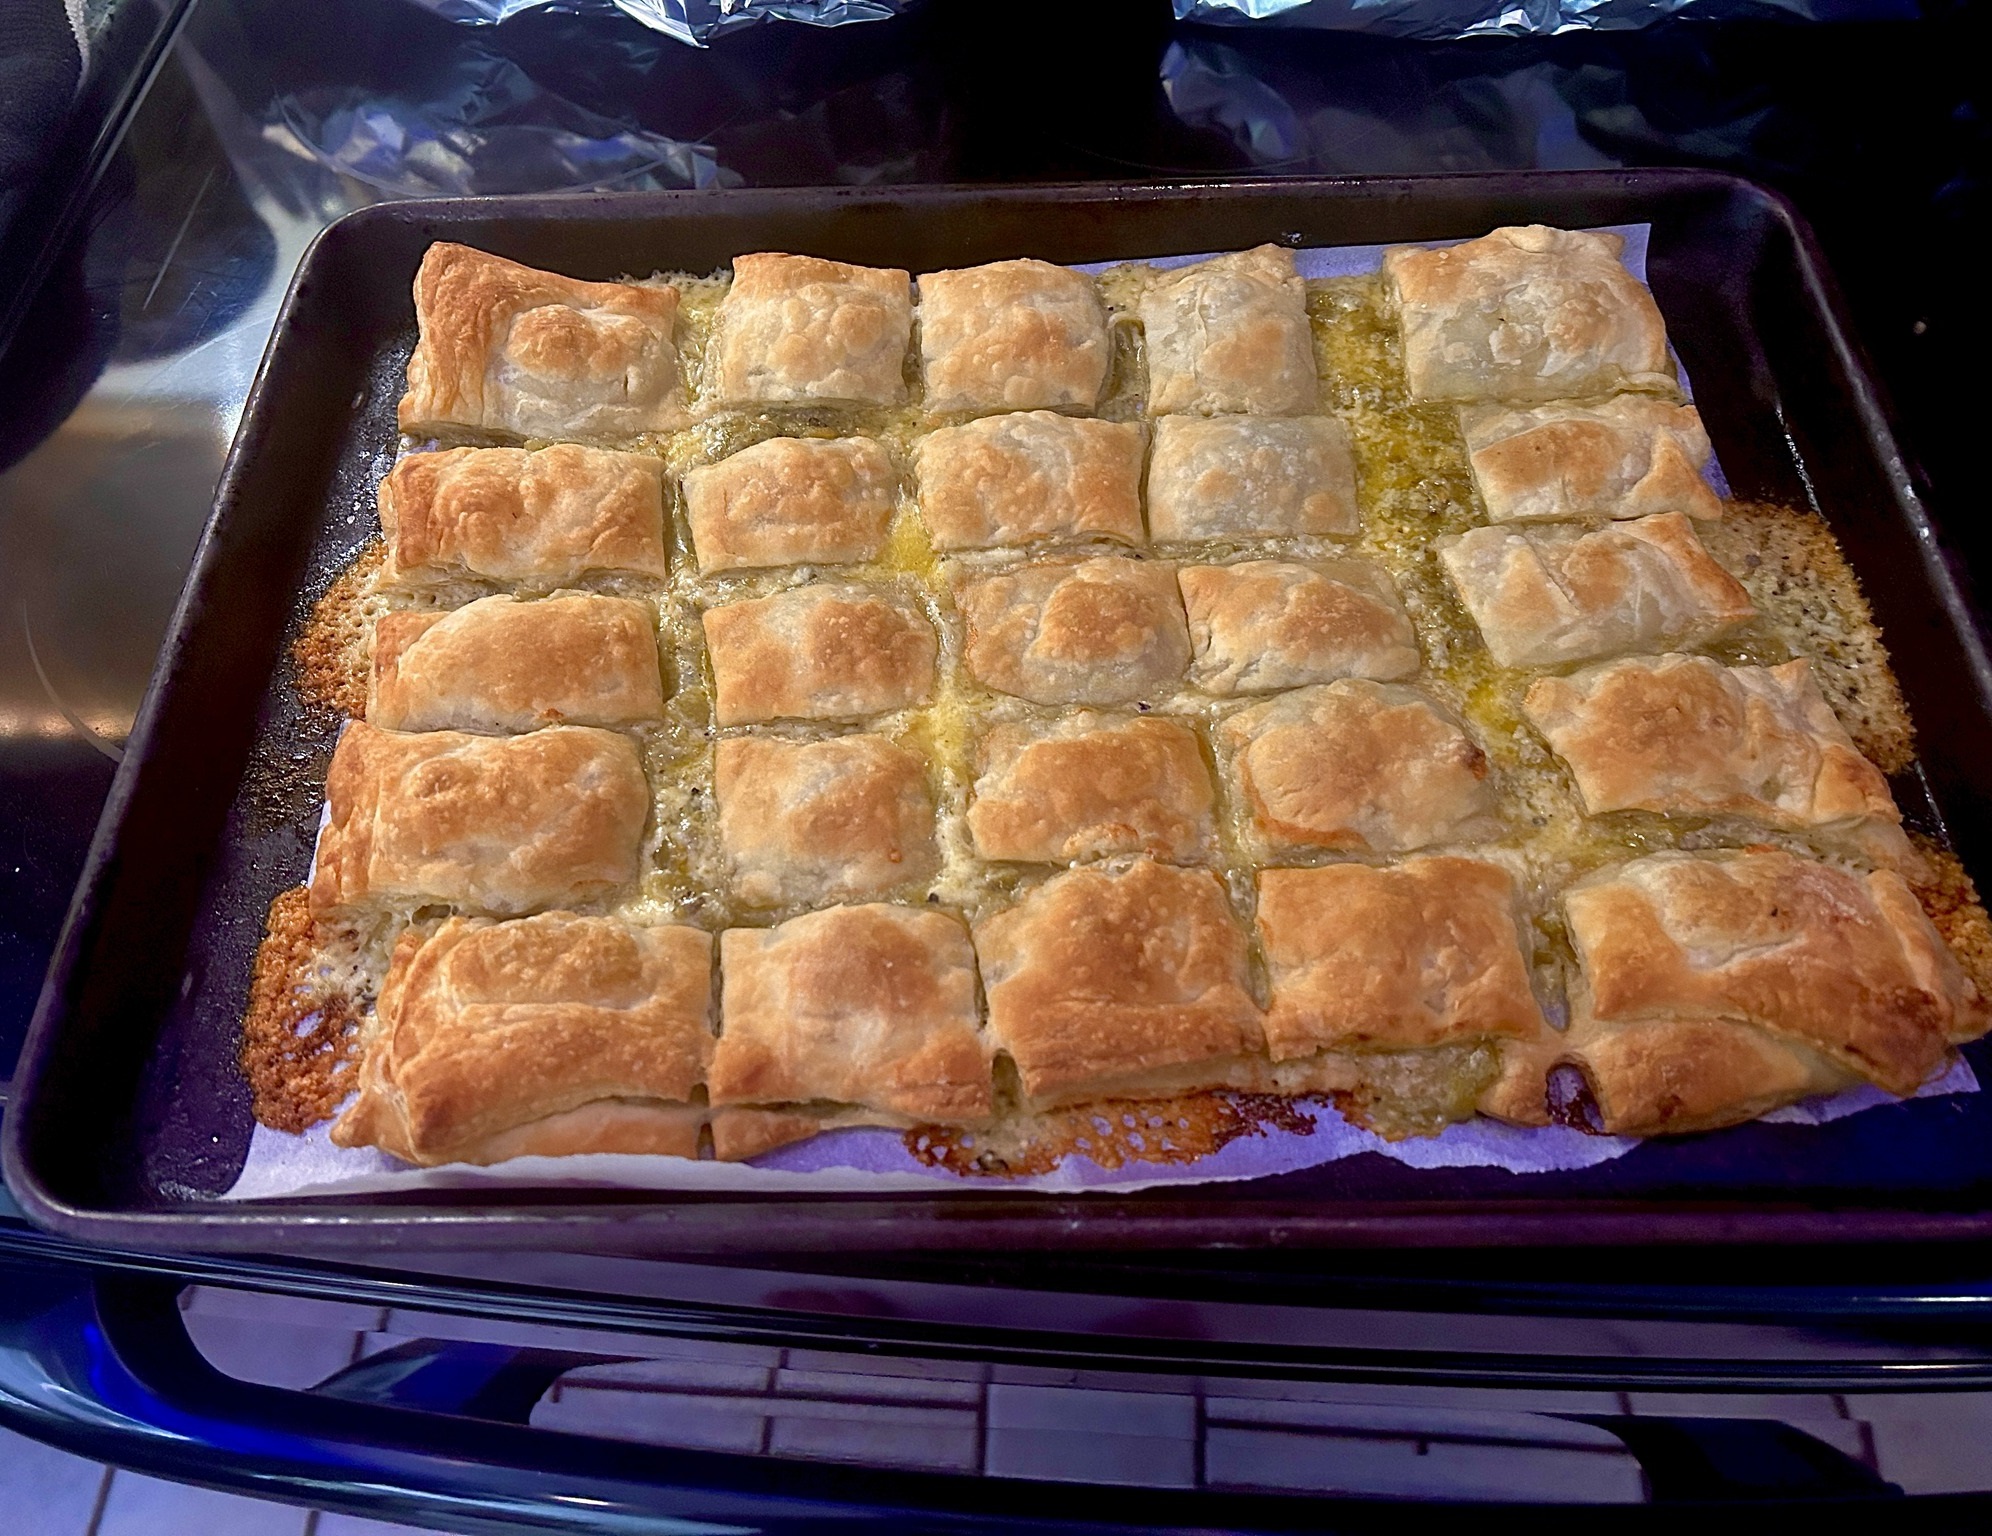
Chile Relleno Puffs
Chile Relleno Puffs are a delicious twist on the classic chile relleno, combining the rich flavors of cheddar cheese and green chile in a flaky puff pastry shell. These savory bites are easy to prepare, making them a perfect appetizer or snack.
The cheese melts beautifully, and the green chile adds a flavorful kick, all encased in golden, crisp pastry.
Whether served at a party or as a fun family treat, these puffs are sure to impress with minimal effort.

Why You’ll Love This Recipe:
People will love this Chile Relleno Puff recipe because it delivers the perfect balance of flavors and textures.
The buttery, flaky puff pastry creates a satisfying crunch, while the gooey, melted cheddar cheese offers a creamy richness.
The addition of green chile gives a zesty, slightly smoky kick, making each bite irresistible.
It’s an easy-to-make, yet impressive appetizer that combines the beloved flavors of traditional chile rellenos with the convenience of puff pastry—perfect for any occasion!
Key Ingredients:
Puff Pastry Sheets: The flaky, buttery base that wraps around the filling, providing a crisp texture.
Cheddar Cheese: A rich, melty cheese that pairs perfectly with the green chile, adding creaminess and depth of flavor.
Green Chile: Adds a flavorful, slightly smoky kick, giving the puffs their signature zesty taste.
Butter or Olive Oil: Used to brush between the pastry sheets, helping to seal the puffs and create a golden, crispy finish.
How to make Chile Relleno Puffs
Ingredients:
Puff Pastry sheets
Cheddar Cheese
Green Chile
Instructions:

Puff pastry (2 sheets per package)
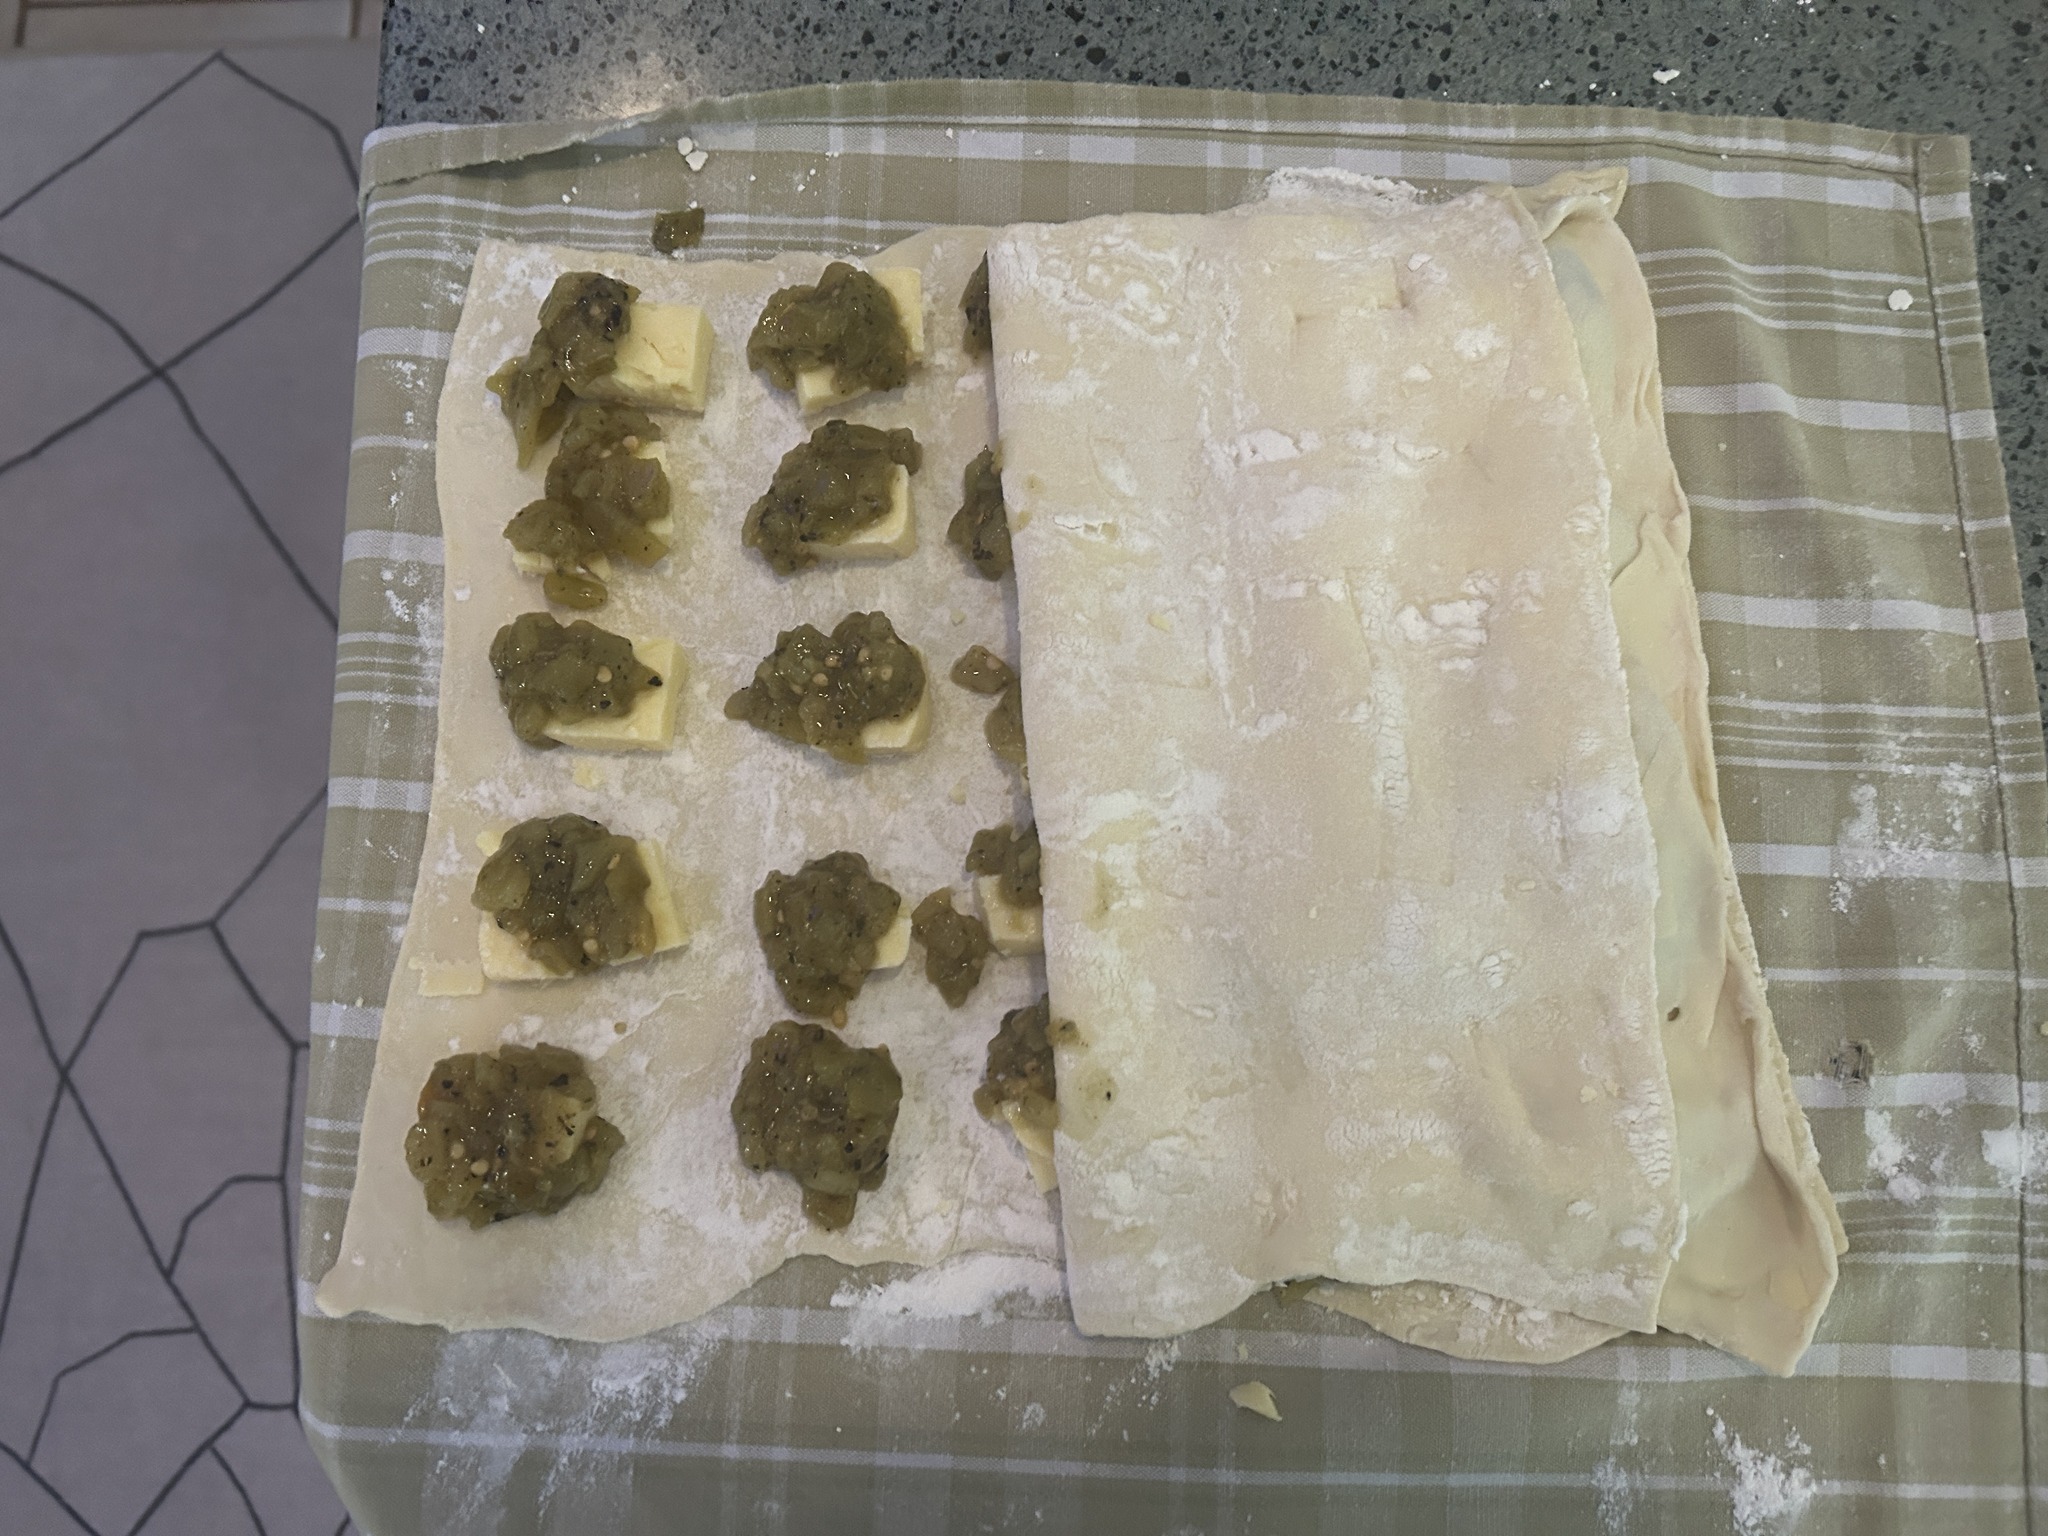
thaw and roll out sheet to roughly increase sheet by two.
Place Hunks of Cheddar (I love Coastal Cheddar from Costco)
Put a dollop of diced green Chile on each hunk of cheese.
Brush butter or olive oil between all rows and edge.
Cover with 2nd sheet and push to seal between rows and columns.
Place in a 350 degree oven for about 30 minutes until golden brown and serve.
Notes:
Puff Pastry Preparation:
Thawing: Ensure the puff pastry sheets are completely thawed before using. This prevents them from tearing or cracking during rolling.
Rolling Out: Roll out the sheets on a lightly floured surface to prevent sticking. Aim for an even thickness to ensure consistent baking.
Cheese Selection:
Cheddar Variety: Coastal Cheddar is a great choice for its sharp flavor, but other types of cheddar or even Monterey Jack can be used based on personal preference. Ensure the cheese is cut into appropriately sized hunks to melt well.
Green Chile:
Preparation: If using canned green chile, drain it well to avoid excess moisture, which can make the puff pastry soggy.
Dicing: Dice the green chile into small pieces to evenly distribute the flavor and ensure it doesn’t overwhelm the cheese.
Assembly Tips:
Sealing Edges: When sealing the puff pastry, press down firmly between the rows and columns to prevent the filling from leaking out during baking.
Butter/Oil: Brushing with butter or olive oil not only helps seal the edges but also adds a nice golden color and flavor. Make sure to brush the edges thoroughly.
Baking Instructions:
Preheating: Ensure the oven is fully preheated to 350°F before placing the puffs inside to achieve even baking.
Baking Time: Bake until golden brown. Oven temperatures can vary, so start checking a few minutes before the suggested time to avoid over-baking.
Serving Suggestions:
Serving Warm: Chile Relleno Puffs are best served warm. They can be reheated briefly in the oven to restore crispness if they have cooled down.
Make-Ahead and Storage:
Make-Ahead: You can prepare the puffs ahead of time and freeze them before baking. Bake from frozen, adding a few extra minutes to the baking time.
Storage: Store leftover puffs in an airtight container in the refrigerator for up to 3 days. Reheat in the oven to maintain their crispiness.
Variations:
Spice Level: For more heat, use a spicier variety of green chile or add a sprinkle of red pepper flakes.
Additional Fillings: Consider adding other fillings like cooked ground beef or black beans for a heartier option.
Dietary Considerations:
Gluten-Free: If you need a gluten-free version, look for gluten-free puff pastry alternatives available in stores.
Cheese Alternatives: For a dairy-free version, use dairy-free cheese and ensure the puff pastry is dairy-free.
Presentation:
Garnishing: Garnish with fresh cilantro or a sprinkle of extra cheese before serving for added flavor and visual appeal. Serve with salsa or sour cream on the side for dipping.
Nutrition Information:
YIELDS: 6 | SERVING SIZE: 1
Calories: 148 kcal | Total Fat: 11g | Saturated Fat: 6g | Trans Fat: 0g | Cholesterol: 138mg | Sodium: 267mg | Total Carbohydrates: 5g | Dietary Fiber: 0g | Sugars: 0g | Protein: 9g
Frequently Asked Questions:
Can I use different types of cheese in this recipe?
Absolutely! While cheddar and Monterey Jack cheeses are suggested, you can experiment with other cheeses that you enjoy.
Just ensure they melt well and complement the flavors of the dish.
Can I adjust the level of spiciness in the puffs?
Yes, you can customize the spiciness by adjusting the amount of hot sauce you add.
Start with a small amount and gradually increase to achieve your preferred level of heat.
What is the purpose of using gluten-free flour?
The use of gluten-free flour (g f all-purpose baking flour) in this recipe is intended for those who follow a gluten-free diet.
If you don’t have dietary restrictions, you can use regular all-purpose flour instead.
How do I know when the puffs are cooked through?
The puffs should be firm to the touch and golden brown on top when they are cooked through.
You can also insert a toothpick into the center; if it comes out clean, the puffs are ready.
Can I make these puffs ahead of time?
Yes, you can prepare the batter and fill the muffin cups ahead of time.
Keep the filled muffin tin in the refrigerator until you’re ready to bake.
This can be convenient for serving freshly baked puffs on demand.
How do I ensure the puff pastry turns out golden brown?
Baking at 350 degrees for about 30 minutes should result in a nicely golden-brown puff pastry.
Keep an eye on the puffs as they bake, and if needed, you can extend the baking time slightly for a deeper color.
Can I add other ingredients to the filling?
Absolutely! You can get creative with the fillings.
In addition to cheese and green chile, you might consider adding cooked and crumbled bacon, sautéed onions, or even some herbs for added flavor and texture.