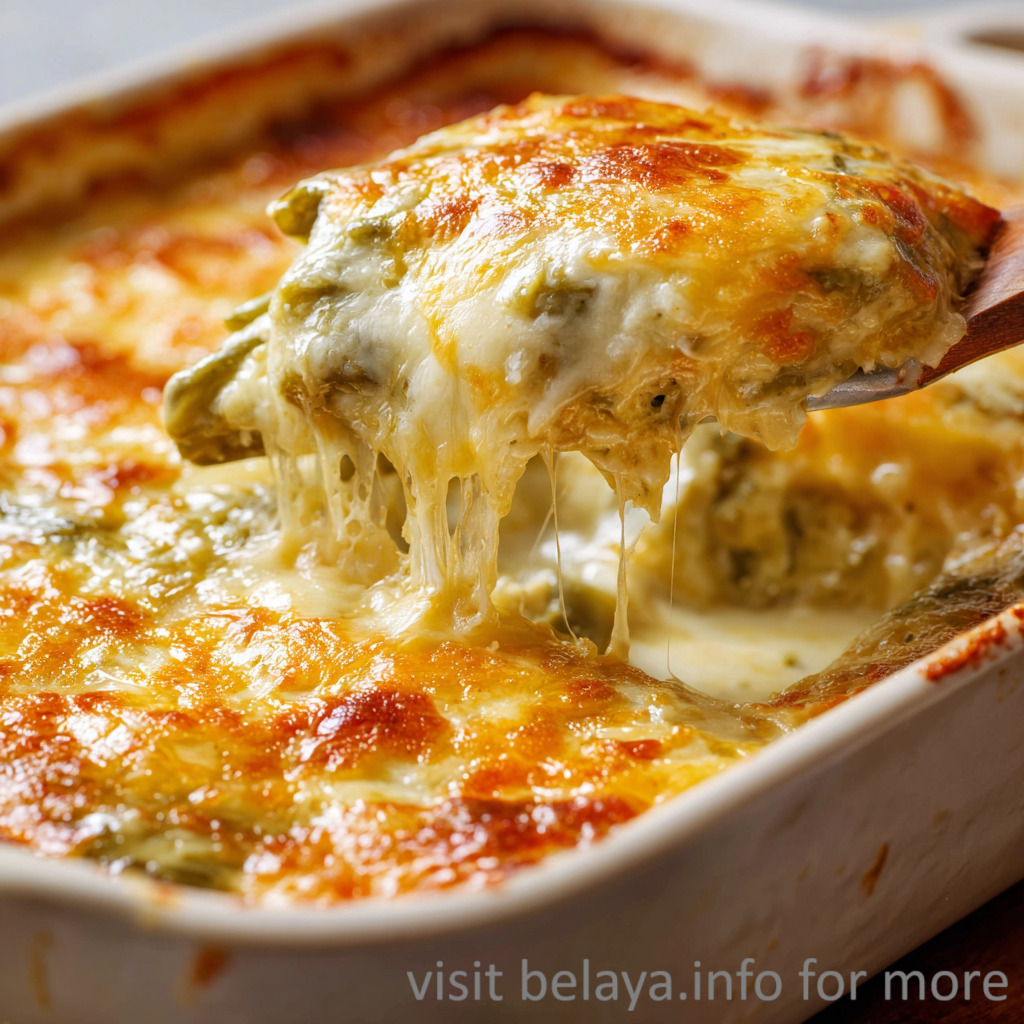
Low Carb Hatch Chile Rellenos Casserole
This Low Carb Hatch Chile Rellenos Casserole is a soul-satisfying tribute to the bold, smoky flavors of the Southwest — particularly New Mexico, where Hatch chiles are the heart of local cuisine. It transforms the traditional chile relleno into a layered, oven-baked comfort dish that’s both lighter and easier to make while keeping every ounce of that roasted chile magic.
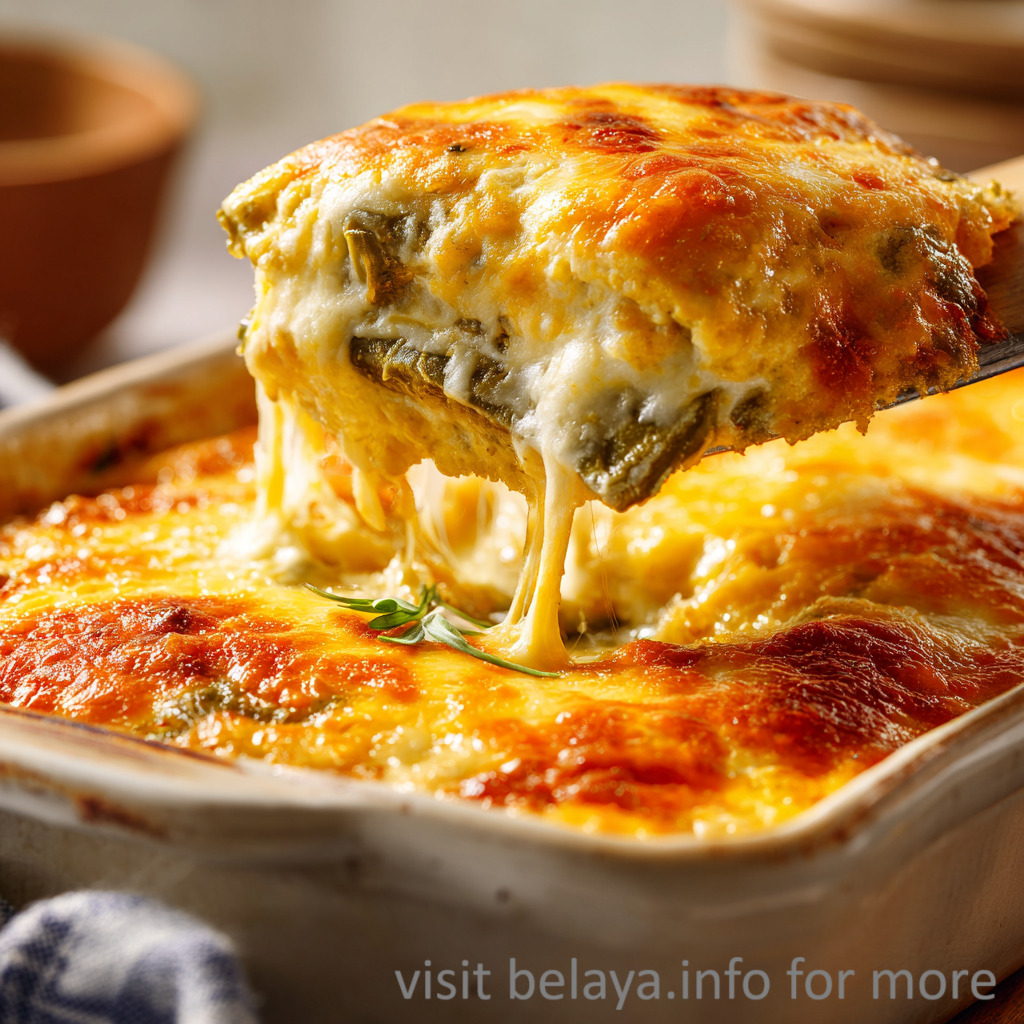
Tender roasted chiles are blanketed in creamy cheeses and gently set in a custard-like egg base, creating a dish that’s rich yet balanced, indulgent yet wholesome. Every bite delivers warmth — the gentle heat of Hatch peppers, the saltiness of cotija, and the velvety melt of cheddar — harmonizing into a deeply satisfying, low-carb masterpiece.
Whether enjoyed fresh from the oven for dinner or as a reheated breakfast slice the next day, this casserole celebrates the rustic beauty of simple ingredients transformed into something truly special — smoky, cheesy, and irresistibly comforting.
Why People Will Love Low Carb Hatch Chile Rellenos Casserole Recipe:
A modern twist on a classic favorite:
This casserole captures the essence of traditional chile rellenos — roasted peppers, creamy cheese, and comforting warmth — but in an easier, low-carb, no-frying format that’s perfect for everyday cooking.
Smoky, rich, and deeply flavorful:
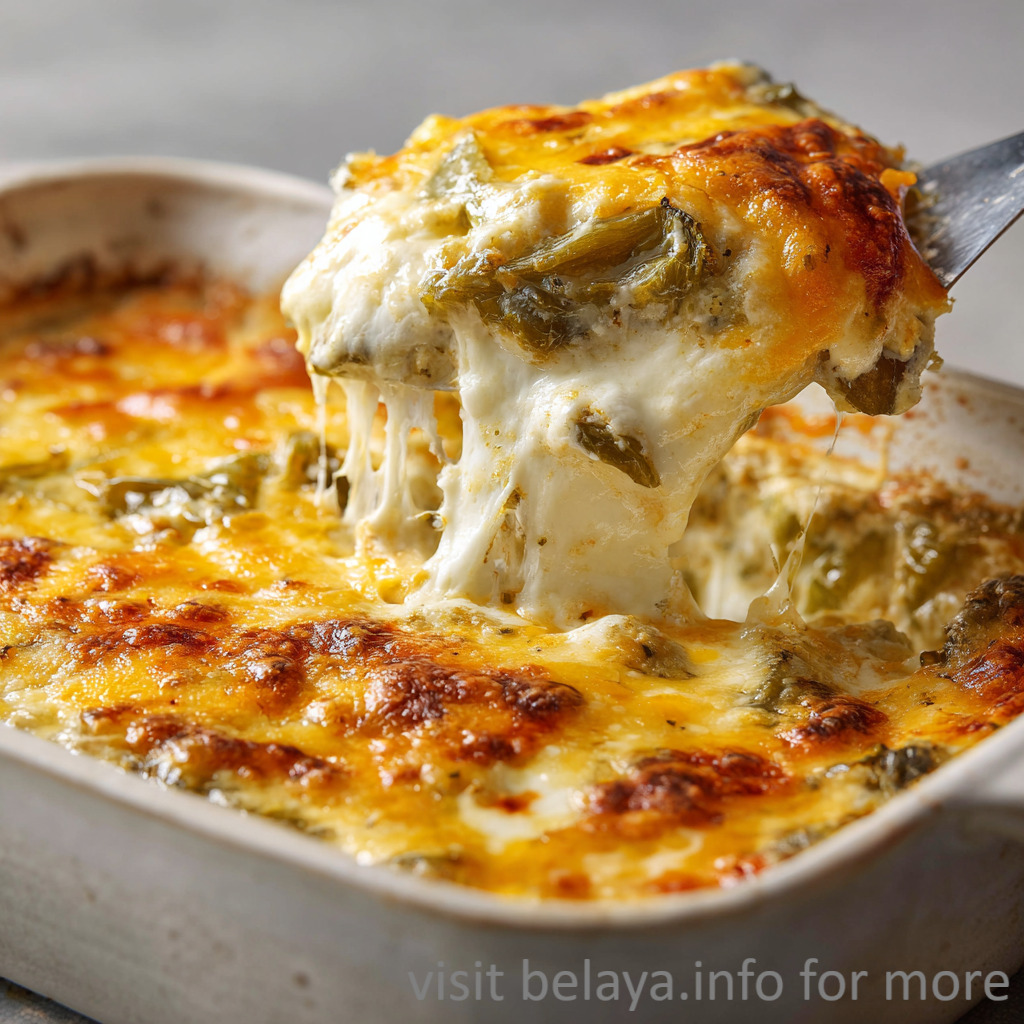
The roasted Hatch or poblano chiles bring a natural smokiness that pairs beautifully with the buttery cheddar and tangy cotija, creating layers of depth that unfold in every bite.
Keto-friendly yet indulgent:
With no breading or heavy batter, this recipe fits perfectly into a low-carb lifestyle without sacrificing flavor or satisfaction. It’s proof that healthy comfort food can still taste decadent.
Perfectly balanced textures:
The soft roasted chiles, melty cheeses, and light, custardy egg base come together into a dish that’s simultaneously creamy, airy, and hearty — the kind of texture contrast that keeps you coming back for more.
Versatile for any meal:
It’s equally at home as a hearty breakfast with eggs and salsa, a simple lunch with salad, or a satisfying dinner paired with beans or avocado. This versatility makes it a recipe you’ll return to again and again.
Make-ahead and freezer-friendly:
It reheats beautifully, maintaining its structure and flavor. That makes it perfect for meal prep, family gatherings, or a quick weekday dinner solution.
Key Ingredients:
Hatch or Poblano Chiles – The Soul of the Dish:
These roasted peppers are the heart of this casserole — smoky, earthy, and slightly sweet with just the right touch of heat. Hatch chiles, in particular, bring a depth that’s unmistakably New Mexican, infusing every layer with a bold, sun-kissed flavor.
Queso Fresco or Cotija – The Salty, Tangy Balance:
Crumbly and slightly briny, these Mexican cheeses add contrast to the creamy elements. Queso fresco lends a fresh, milky lightness, while cotija provides a sharp, aged flavor that melts beautifully into the eggs and peppers.
Sharp Cheddar Cheese – The Comforting Melt:
With its rich, buttery flavor and perfect melting quality, cheddar forms the golden crown of this dish. It ties everything together with gooey warmth, balancing the smokiness of the chiles and the saltiness of the crumbly cheese.
Eggs – The Silky Binder:
Whisked with salt and pepper, the eggs create a delicate, custard-like texture that gently holds the roasted chiles and cheeses in place. As it bakes, the egg mixture puffs slightly, transforming the casserole into a light yet satisfying comfort meal.
Olive Oil – The Subtle Enhancer:
A brush of olive oil adds richness to the base, prevents sticking, and deepens the flavor with its gentle fruitiness — an understated touch that makes every layer shine.
Expert Tips:
Roast the Chiles Properly for Depth of Flavor:
The secret to authentic, smoky richness lies in how you roast the chiles. Use an open flame, broiler, or charcoal grill — turning them often until the skins blister evenly. The slight char adds complexity, while the steaming step in a paper bag helps peel the skins effortlessly without losing their juicy texture.
Drain and Dry the Chiles Before Layering:
After peeling, pat the roasted chiles dry with paper towels. Too much residual moisture can dilute the egg mixture and make the casserole watery. A few extra seconds of drying ensures each layer bakes evenly and holds together beautifully.
Use Freshly Grated Cheese for Superior Melt:
Skip pre-shredded cheese — its anti-caking agents prevent smooth melting. Grating cheddar fresh allows it to melt into a luscious, even layer that unites all the flavors in creamy harmony.
Let the Egg Mixture Set Before Serving:
Once baked, give the casserole 5–10 minutes to rest. This short resting period allows the eggs to firm slightly and the cheese to stabilize, resulting in perfect slices that hold their shape while staying tender inside.
Adjust Spice and Salt Thoughtfully:
Hatch and poblano chiles can vary in heat. Taste a small piece before assembling the casserole, then adjust the salt and pepper in your egg mixture accordingly. If you prefer extra warmth, add a pinch of cayenne or a dash of green chile powder.
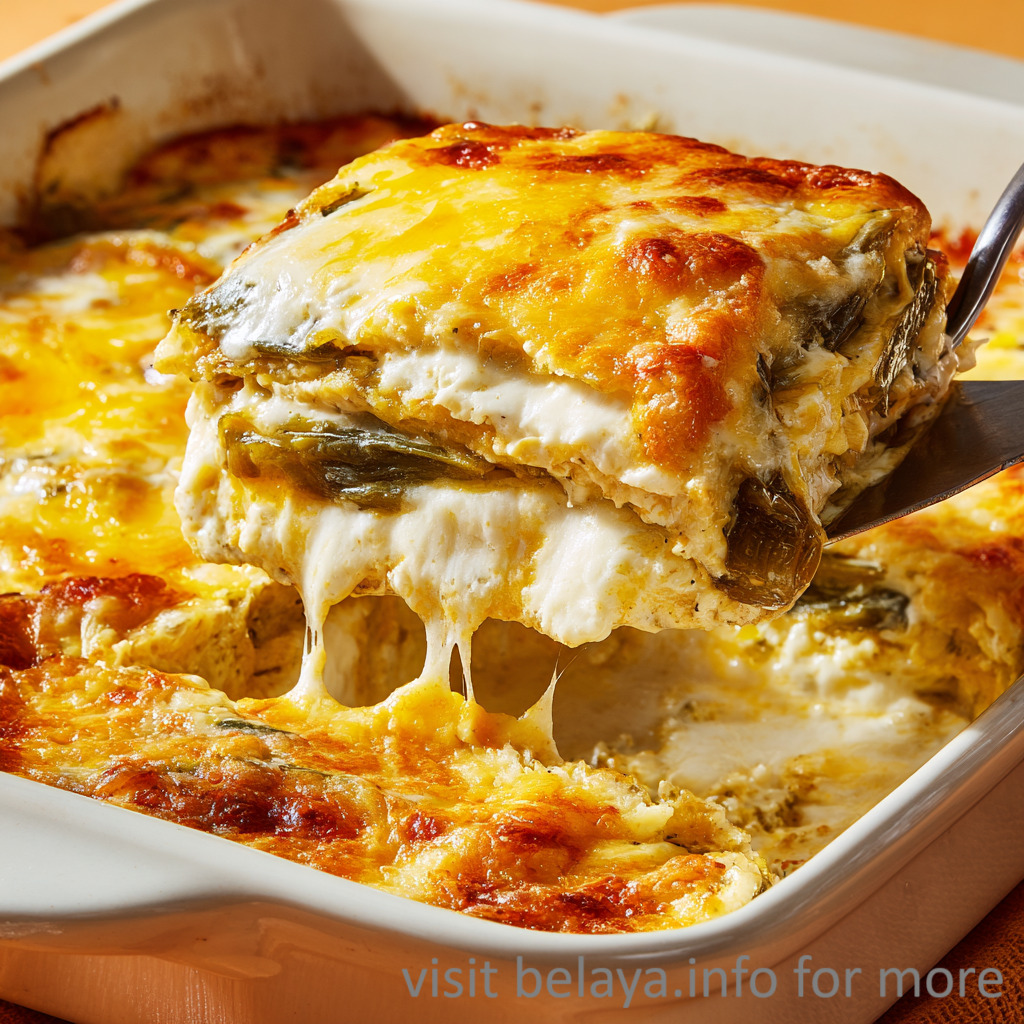
Add Layers for Texture and Flavor:
Layering the chiles, cotija, and cheddar not only adds structure but also ensures that each bite has a balance of creaminess, tang, and smokiness. For an even more indulgent touch, drizzle a tablespoon of cream or a spoonful of salsa verde between layers.
Don’t Skip the Olive Oil Base:
That light brush of olive oil at the bottom of the pan does more than prevent sticking — it helps develop a subtle roasted flavor on the bottom layer of chiles, almost like the crispy edge of a traditional relleno.
Low Carb Hatch Chile Rellenos Casserole
Ingredients
For the Base:
1½ pounds Hatch, poblano, pasilla, or Anaheim chiles — roasted or charred until skins blister, then peeled, seeded, and deveined
2 tablespoons olive oil — for greasing the baking dish and layering flavor
For the Cheese Layers:
6 ounces queso fresco or cotija cheese, crumbled — adds salty, tangy depth (substitute ricotta cheese for a softer, creamier texture)
12 ounces sharp cheddar cheese, freshly grated — melts beautifully and gives a rich, golden top
For the Egg Mixture:
4 large eggs, beaten — binds the casserole and creates a custard-like texture
1 teaspoon kosher salt — enhances the natural sweetness of roasted chiles and balances the cheese
½ teaspoon freshly ground black pepper — for subtle heat and depth
Instructions
Step 1: Roast and Prepare the Chiles
Preheat your broiler or heat up a charcoal grill. Place the Hatch or poblano chiles directly under the heat and roast, turning occasionally, until the skins are evenly blistered and blackened on all sides.
Transfer the roasted chiles to a paper bag, fold it closed, and let them steam for about 10 minutes — this helps loosen the skins.
Once cool enough to handle, peel off and discard the skins, stems, seeds, and inner veins. Set the cleaned chiles aside.
Step 2: Preheat and Prepare the Baking Dish
Preheat your oven to 375°F (190°C).
Brush the bottom of a 10.5 x 7.5-inch baking dish with olive oil to prevent sticking and add flavor.
Step 3: Layer the Casserole
Start by laying a single layer of roasted chiles across the bottom of the dish.
Sprinkle with about 2 ounces of crumbled queso fresco (or cotija) and 4 ounces of shredded cheddar cheese.
Repeat this process twice more, creating three total layers, finishing with the cheeses on top for a golden, bubbly crust.
Step 4: Add the Egg Mixture
In a medium bowl, whisk together the beaten eggs, kosher salt, and black pepper until smooth and well blended.
Slowly pour the egg mixture evenly over the layered chiles and cheeses, allowing it to seep between the layers.
Step 5: Bake Until Set
Cover the baking dish loosely with foil and bake for 35–40 minutes, or until the casserole is puffed, golden, and no longer jiggly in the center.
For a lightly browned top, uncover during the final 5 minutes of baking.
Step 6: Serve or Store
Let the casserole rest for 5–10 minutes before slicing — this helps it set and makes serving easier.
Enjoy warm for breakfast, lunch, or dinner, or serve at room temperature for a flavorful, satisfying meal.
Storage & Reheating Tips:
To freeze: Cut into squares, wrap individually in foil or plastic wrap, and store in an airtight container for up to 2 months.
To reheat: Thaw overnight in the refrigerator and warm each piece in the microwave for 45–60 seconds, or in a 350°F oven for 10 minutes for best texture.
Important Notes When Making Low Carb Hatch Chile Rellenos Casserole
Choosing the Right Chiles:
The flavor and mild heat of this dish depend heavily on the type of chile you use. Hatch chiles (from New Mexico) offer a balanced, smoky heat, while poblanos bring a milder, earthier note. If you prefer even less spice, Anaheim chiles are perfect. Avoid canned chiles if possible — roasting fresh ones gives this casserole its authentic, fire-roasted depth.
Control the Moisture for the Perfect Texture:
One of the most common mistakes in chile relleno casseroles is excess liquid. Be sure to pat the roasted chiles dry and use freshly grated cheese, not pre-shredded. The anti-caking starches in packaged cheese release moisture when baked, which can prevent the casserole from setting properly.
Layering Is Key:
This dish relies on layers to balance flavors and create structure. Be intentional — spread your chiles evenly, sprinkle cheese generously but not heavily, and pour the egg mixture slowly to fill the gaps. This ensures that each slice has the perfect ratio of chile, cheese, and custard.
Let It Rest Before Cutting:
Once baked, resist the urge to slice right away. Allowing the casserole to rest for 5–10 minutes lets the proteins in the eggs firm up, preventing the layers from collapsing. It also helps the flavors meld and the cheese set slightly for cleaner, neater portions.
Cheese Substitutions and Customization:
If queso fresco or cotija isn’t available, ricotta adds creaminess with a light tang, while Monterey Jack or pepper jack can bring extra melt and spice. Just remember that salt levels vary between cheeses — adjust seasoning to avoid overpowering the roasted chile flavor.
Freezer and Reheating Wisdom:
This casserole freezes beautifully if wrapped tightly. For best results, freeze in individual portions for quick reheating. Always thaw overnight in the refrigerator before reheating to preserve texture — microwaving from frozen can make it rubbery or watery.
Make It Your Own:
This recipe is a blank canvas for creativity — try adding crumbled chorizo, sauteed onions, or even a thin layer of refried beans for a heartier twist. A drizzle of crema mexicana or green chile sauce on top before serving can turn it from simple comfort food into a restaurant-quality dish.
How to Enjoy Low Carb Hatch Chile Rellenos Casserole After Cooking:
Let the Flavors Settle Before Serving:
Once the casserole comes out of the oven, allow it to rest for about 10 minutes. This short pause lets the custard-like egg base firm up slightly and allows the roasted chile and cheese flavors to meld beautifully. Cutting too soon can make the layers fall apart — patience rewards you with perfect, clean slices.
Serve Warm for the Best Experience:
The ideal serving temperature is warm, not piping hot — around 140–150°F. This ensures that the cheeses are still melty and the chile flavor shines through without overpowering heat.
Pair It Thoughtfully:
For Breakfast or Brunch: Serve a square of the casserole with sliced avocado, a drizzle of salsa verde, and a spoonful of Mexican crema. Add scrambled eggs or chorizo on the side for a heartier meal.
For Lunch: Pair it with a crisp green salad tossed in lime vinaigrette or a bowl of charro beans for contrast in texture and acidity.
For Dinner: Serve alongside Spanish rice, roasted vegetables, or even a simple cauliflower rice for a fully low-carb option that still feels indulgent.
Toppings That Elevate the Experience:
Sprinkle fresh cilantro, a squeeze of lime juice, or a dusting of smoked paprika before serving. These small touches add freshness, acidity, and depth — the kind of finishing detail that transforms comfort food into something restaurant-worthy.
Enhance the Flavor with Sauces:
A drizzle of green chile enchilada sauce adds tang and spice.
Tomatillo salsa brings brightness and balances the richness of the cheeses.
For a creamy touch, a spoonful of chipotle crema or sour cream provides contrast and smoothness.
How to Serve for Gatherings:
Cut into neat squares and arrange them on a platter garnished with lime wedges and cilantro sprigs. This makes it easy for guests to grab a portion while keeping presentation elegant and appetizing. It’s a perfect make-ahead dish for brunches, potlucks, or family dinners.
Creative Ways to Enjoy Leftovers:
Breakfast Burrito: Wrap a reheated slice in a low-carb tortilla with eggs and avocado for a quick breakfast.
Taco Filling: Crumble leftovers into a skillet and use them as a cheesy chile filling for tacos or quesadillas.
Stuffed Bell Peppers: Spoon leftover casserole into halved bell peppers, sprinkle with cheese, and re-bake until bubbly.
Reheating for the Perfect Texture:
Reheat individual servings in the oven at 350°F (175°C) for about 10 minutes, or until warmed through. This keeps the cheese creamy and the edges slightly crisp. Avoid microwaving for too long — it can separate the cheese and eggs, dulling the flavor.
Nutrition Information
(Per Serving — Approx. 1/8 of Casserole)
Calories: 265 kcal | Total Fat: 21.4 g | Saturated Fat: 9.6 g | Monounsaturated Fat: 8.1 g | Polyunsaturated Fat: 1.2 g | Cholesterol: 165 mg | Sodium: 480–550 mg (depending on cheese and added salt) | Total Carbohydrates: 5.3 g | Dietary Fiber: 1.7 g | Sugars: 2.1 g | Protein: 16.8 g
Frequently Asked Questions:
Can I use canned green chiles instead of fresh Hatch chiles?
Yes, you can substitute canned green chiles if fresh Hatch or poblanos aren’t available, but the flavor will be milder and less smoky. For best results, use fire-roasted canned chiles and drain them thoroughly to avoid excess moisture in the casserole.
Is this casserole spicy?
The heat level depends on the type of chiles used. Hatch chiles can range from mild to medium heat, while poblanos are generally milder. If you want to tone it down, remove all seeds and membranes before layering. For extra spice, add a dash of cayenne pepper or top with sliced jalapeños before baking.
Can I make this recipe ahead of time?
Absolutely. Assemble the casserole completely, cover tightly with foil, and refrigerate for up to 24 hours before baking. When ready to cook, bring it to room temperature for about 20 minutes and then bake as directed. It’s an excellent choice for meal prep or hosting brunch.
What can I serve with this casserole to make it a full meal?
This dish pairs beautifully with Mexican rice, charro beans, or a fresh avocado salad. For a lighter option, serve it with grilled vegetables, cauliflower rice, or a crisp green salad with lime vinaigrette to balance its richness.
How long does it last, and what’s the best way to store leftovers?
Store leftovers in an airtight container in the refrigerator for up to 4 days. For longer storage, freeze individual squares wrapped in foil for up to 2 months. Reheat gently in a 350°F (175°C) oven for 10–12 minutes to restore texture and flavor — avoid microwaving too long, as it may make the eggs rubbery.
How do I roast Hatch chiles perfectly without burning them?
To achieve that signature smoky flavor without bitterness, roast the chiles over medium-high heat, turning them often until evenly blistered and blackened on all sides. Once roasted, immediately place them in a sealed paper bag or covered bowl for 10 minutes to steam. This step loosens the skins, making peeling effortless while keeping the flesh tender and flavorful.
Why does my casserole turn watery after baking?
Excess moisture usually comes from improperly dried chiles or using pre-shredded cheese (which often contains moisture-blocking additives). After roasting, pat chiles completely dry, and use freshly grated cheddar for best results. Also, ensure your egg mixture is well whisked to create a balanced custard that sets firmly.
Can I make this recipe dairy-free?
Yes — replace the cheeses with dairy-free mozzarella or cheddar alternatives and use unsweetened almond milk mixed with 1 tablespoon of nutritional yeast for a creamy flavor substitute. The texture will be slightly different but still delicious and satisfying.
How do I prevent the top from browning too quickly?
If your cheese starts browning before the eggs are fully set, cover the dish loosely with foil halfway through baking. Then uncover during the last 5 minutes to allow gentle browning and bubbling. This ensures a perfect crust without burning or overcooking the interior.
Can I double the recipe for a larger crowd?
Yes, you can easily double it — just use a 9×13-inch baking dish and extend the baking time by about 10–12 minutes. Keep an eye on the center; the casserole should be golden and firm with no jiggle when gently shaken. For even baking, rotate the pan once during cooking.