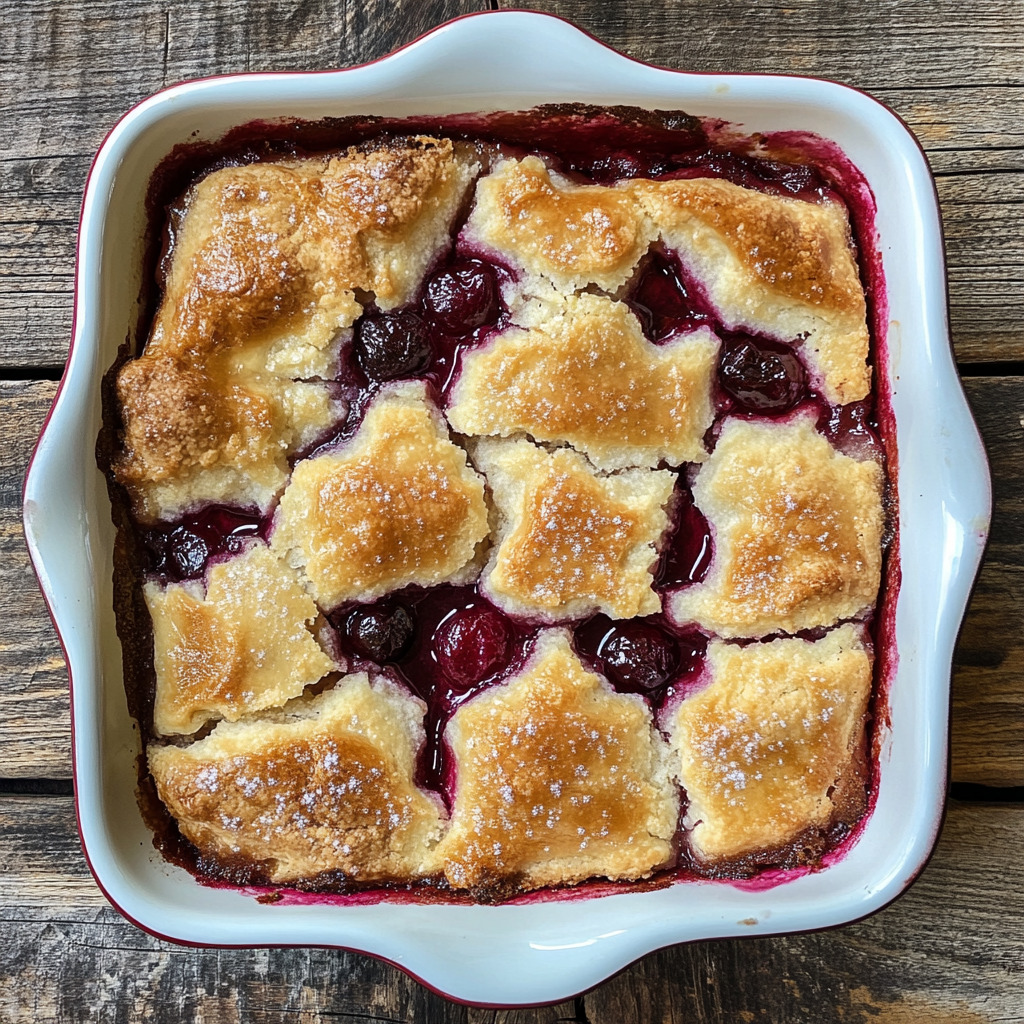
Cupa Cupa Cupa Cobbler
A true testament to Southern simplicity, the Cupa Cupa Cupa Cobbler is more than just a dessert—it’s a celebration of tradition passed down through generations. Named for its humble ratio of equal parts flour, sugar, and milk, this rustic cobbler delivers rich, buttery edges and a soft, pudding-like center that cradles juicy, bubbling fruit.
With no need for fancy techniques or mixers, it’s the kind of back-of-the-box magic that relies on pantry staples and pure flavor.
Served warm with a scoop of vanilla ice cream, it becomes a soul-soothing experience you’ll return to time and time again.
Why People Will Love The Cupa Cupa Cupa Cobbler recipe:
Effortless nostalgia: Its simple 1:1:1 ratio and buttery richness bring back childhood memories of homemade desserts with minimal effort.
Foolproof and forgiving: No special tools or techniques required—just stir, layer, and bake. It’s perfect for beginners and seasoned bakers alike.
Customizable fruit base: Whether using juicy summer peaches, tart cherries, or sweet berries, this cobbler transforms with the seasons while maintaining its comforting soul.
Unique self-layering texture: The no-stir method creates a magical layering—crisp, golden edges on top with a soft, custardy center that soaks up fruit juices beautifully.
Pantry-friendly and accessible: Made with ingredients most people already have on hand, making it a go-to recipe for unexpected guests or last-minute cravings.
Deeply Southern in spirit: With roots in Appalachian cooking, this cobbler is a cultural classic that delivers flavor and heart in every bite.
Pairs perfectly with ice cream: Warm cobbler meets cold vanilla ice cream—it’s a timeless dessert duo that satisfies on every level.
Key Ingredients:
Self-Rising Flour: The foundation of the cobbler’s light, tender texture—it includes just the right balance of flour, baking powder, and salt, allowing the batter to rise and form a soft, cake-like crust without extra ingredients.
Granulated Sugar: Not just a sweetener—it caramelizes along the edges as the cobbler bakes, creating golden, chewy borders and a lightly crisped top layer that contrasts the soft interior.
Whole Milk: Adds richness and moisture, binding the flour and sugar into a smooth, pourable batter that transforms into a soft, pudding-like base as it bakes.
Unsalted Butter: Melted in the pan, it forms the flavorful base that prevents sticking while infusing the entire cobbler with deep, nutty undertones and crisp golden edges.
Fresh or Frozen Fruit: The heart of the dessert—whether it’s tart cherries, ripe peaches, or juicy berries, the fruit bubbles up through the batter, infusing every bite with natural sweetness, acidity, and vibrant color.
Expert Tips:
Preheat your baking dish with the butter: Melting the butter in the oven not only greases the dish but creates a hot base that immediately begins to cook the batter on contact, forming the cobbler’s crisp, caramelized edges.
Don’t stir the layers: It may feel counterintuitive, but resist the urge to mix once you’ve poured the batter and added the fruit. This layering is what creates the cobbler’s unique structure—light crust rising above sweet, jammy fruit.
Use room-temperature milk for better rise: Cold milk can slow the self-rising flour’s leavening action. Slightly warm or room-temp milk activates it more evenly for a fluffier texture.
Choose your fruit wisely: For juicy fruits like berries or peaches, you can use them raw. For firmer fruits (like apples), lightly sauté or macerate them first so they soften during baking. This ensures a jammy, spoonable filling.
Control sweetness based on fruit: If your fruit is very ripe or canned in syrup, consider reducing the sugar slightly in the batter to prevent the cobbler from becoming overly sweet.
Let it rest before serving: After baking, allow the cobbler to cool for 10–15 minutes. This helps the juices thicken slightly and makes slicing cleaner while still serving warm.
Use cast iron for even more crust: Baking in a cast iron skillet gives you extra-crispy, caramelized edges and distributes heat beautifully for a rustic, deeply golden finish.
Cupa Cupa Cupa Cobbler
Ingredients:
1 cup self-rising flour
1 cup sugar
1 cup milk
1 stick (1/2 cup) butter
2 cups fruit (peaches, berries, or cherries work great)
Instructions:
Preheat the oven to 350°F (175°C).
Place the butter in a 9×9-inch baking dish and put it in the oven. Let the butter melt completely while the oven heats.
In a mixing bowl, whisk together the self-rising flour, sugar, and milk just until smooth. Avoid overmixing—the batter should be slightly lumpy.
Once the butter is melted, carefully remove the dish from the oven.
Pour the batter directly over the melted butter. Do not stir—the layering helps create the cobbler’s signature texture.
Gently spoon the fruit over the batter, distributing evenly. Again, do not mix.
Return the dish to the oven and bake for 40–45 minutes, or until the top is golden brown and the fruit is bubbling at the edges.
Let cool slightly, then serve warm—ideally with a scoop of vanilla ice cream.
Important Notes When Making Cupa Cupa Cupa Cobbler:
Self-rising flour is essential: This recipe depends on self-rising flour’s built-in leavening. Using all-purpose flour without adding baking powder and salt will result in a dense, heavy cobbler that lacks the signature lift.
Butter must be melted, not mixed: Letting the butter melt directly in the pan serves two critical functions: it creates a nonstick surface and helps the batter begin crisping the moment it hits the hot fat. Never stir the batter into the butter—it disrupts this effect.
The batter rises around the fruit—not over it: Pouring the fruit on top may feel like it’ll burn or sit awkwardly, but trust the method. The batter bakes up and around the fruit, cradling it within the golden crust and creating those signature jammy pockets.
Fruit type affects texture and bake time: Juicier fruits (like berries or ripe peaches) will release more liquid and bubble sooner, while firmer fruits may need to be partially cooked or macerated before baking to ensure tenderness and prevent undercooked bites.
Let it sit after baking: The cobbler may seem loose when it comes out of the oven—but allowing it to rest for 10–15 minutes lets the bubbling juices thicken and the structure settle, making for a more cohesive, scoopable dessert.
Don’t overmix the batter: Stirring too vigorously can toughen the final product. Just whisk until smooth but still slightly lumpy, allowing the flour to hydrate gently and maintain a tender crumb.
Pan size matters: A 9×9 dish creates the perfect ratio of crust to fruit. A larger dish will thin the batter and overbake the edges, while a smaller one can lead to undercooked centers.
Nutrition Information
(Per Serving – Approx. 1/8 of dish)
Calories: 310 | Total Fat: 13g | Saturated Fat: 8g | Trans Fat: 0g | Cholesterol: 35mg | Sodium: 210mg | Total Carbohydrates: 45g | Dietary Fiber: 1g | Sugars: 27g | Protein: 3g | Calcium: ~80mg (6% DV) | Iron: ~1.2mg (7% DV) | Potassium: ~150mg
Frequently Asked Questions:
Can I use all-purpose flour instead of self-rising flour?
Yes, but you’ll need to add leavening.
For each cup of all-purpose flour, add 1½ teaspoons baking powder and ¼ teaspoon salt to replicate self-rising flour.
Without it, the cobbler won’t rise properly.
Can I use canned or frozen fruit?
Absolutely. Canned fruit should be well-drained, especially if packed in syrup.
For frozen fruit, no need to thaw—just add a few extra minutes to the bake time.
Be aware that both may release more moisture than fresh fruit.
Why shouldn’t I stir the batter after pouring it over the butter?
Stirring disrupts the natural layering process.
The batter is meant to rise through the butter and fruit, forming a golden crust while the fruit sinks slightly and softens into a jam-like filling.
Can I double the recipe for a crowd?
Yes—just use a 9×13-inch baking dish and expect to bake for 5–10 minutes longer.
Keep an eye on the color and bubbling edges as your doneness indicators.
How should I store leftovers, and can I reheat it?
Store leftovers covered in the refrigerator for up to 3 days.
Reheat individual portions in the microwave or warm the entire dish in a 300°F (150°C) oven until heated through.
The topping will soften but still taste great.
Why do I melt the butter in the pan instead of mixing it into the batter?
Melting the butter directly in the baking dish creates a hot, buttery base that the batter bakes into.
This technique forms crispy, caramelized edges and prevents sticking—key to the cobbler’s unique texture.
Should I peel the fruit before adding it?
It depends on the fruit and personal preference.
Peaches can be peeled or left with skin—the skin softens during baking.
Berries and cherries can go in as-is.
Firmer fruits (like apples) may benefit from peeling for a smoother bite.
How do I know when the cobbler is done baking?
Look for a deep golden brown crust, bubbling edges, and a lightly firm center that doesn’t jiggle.
A toothpick inserted into the center should come out mostly clean, with a bit of moist crumb but no raw batter.
Can I reduce the sugar in the batter?
Yes, you can reduce the sugar to ¾ cup without drastically affecting the texture.
Just note that sugar helps with browning and moisture retention, so cutting it too much may make the cobbler drier or paler.
Why is my cobbler too runny or watery?
This usually happens when the fruit releases too much juice, especially if it’s very ripe or frozen.
To prevent this, lightly toss the fruit with a teaspoon of flour or cornstarch before layering to absorb excess liquid during baking.