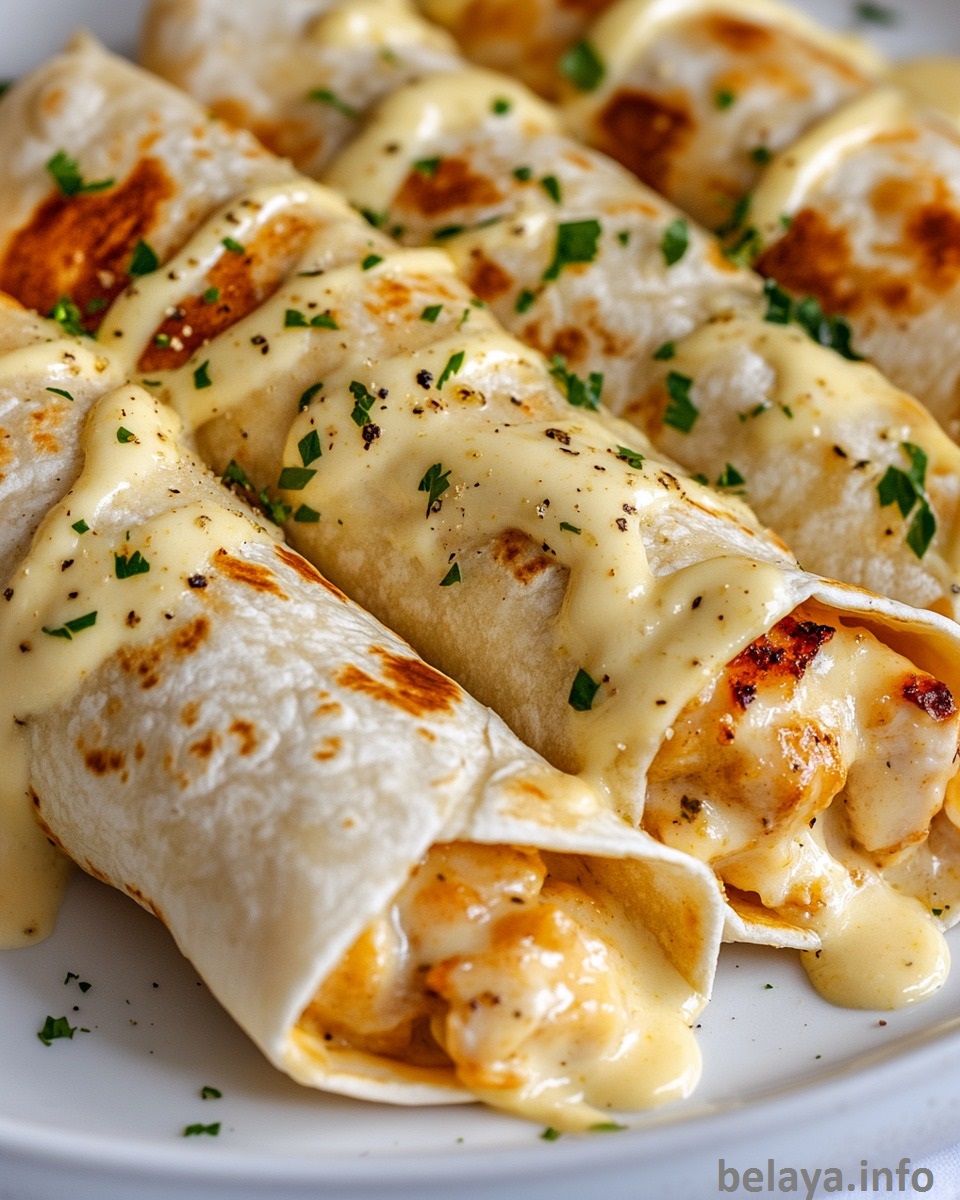
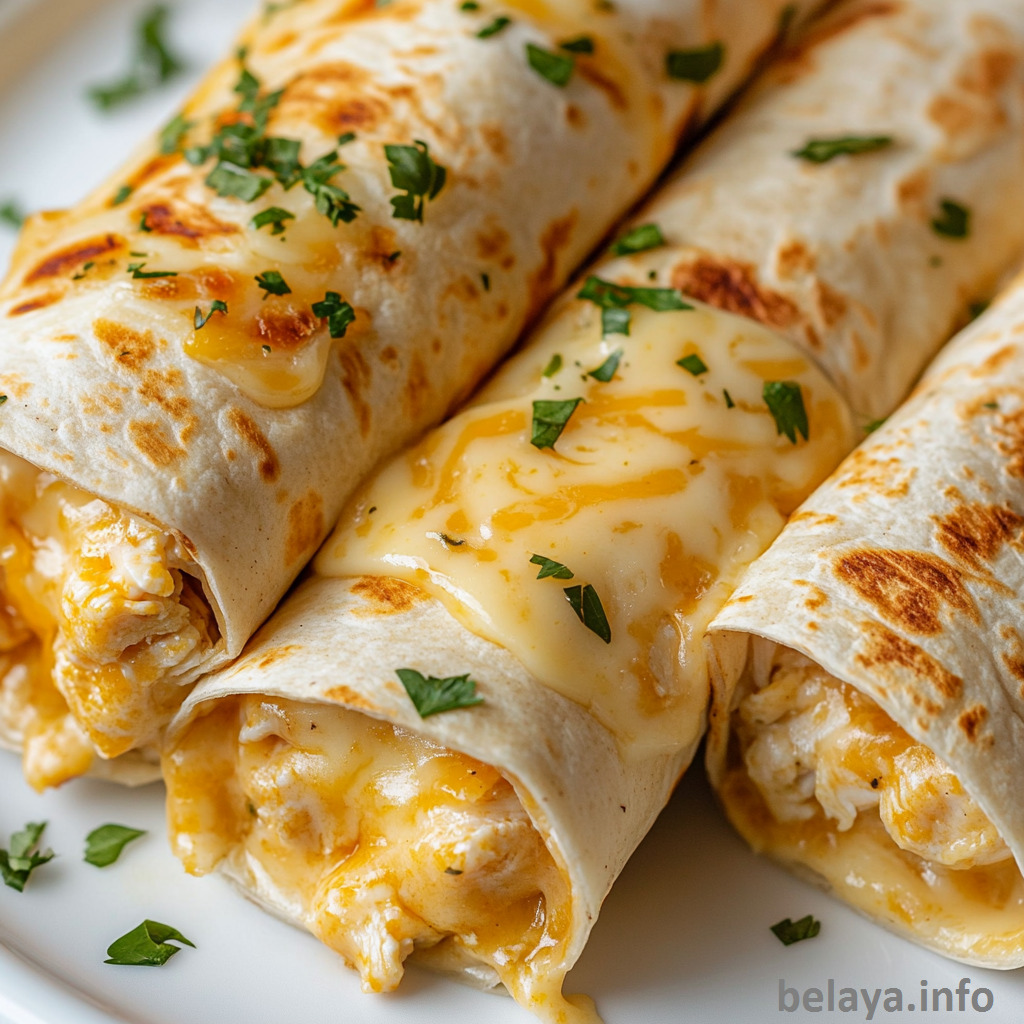
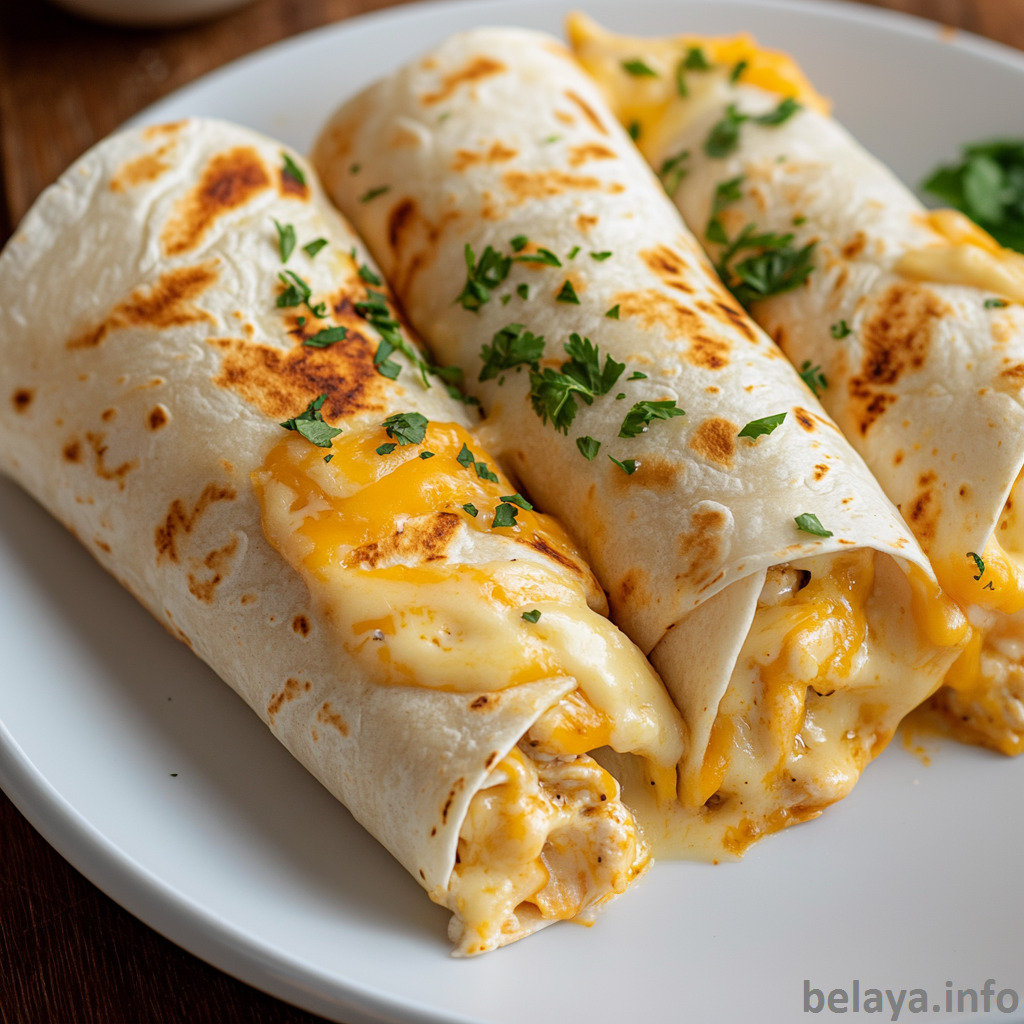
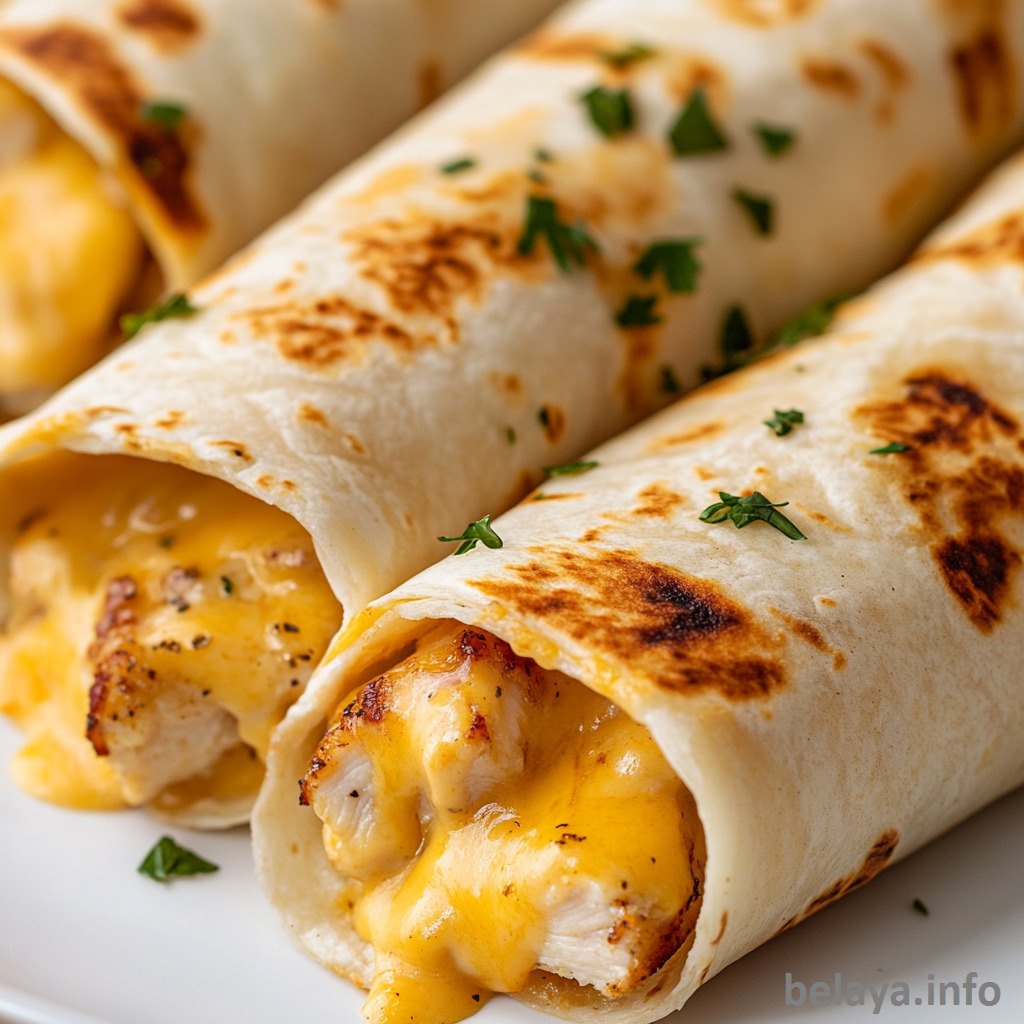
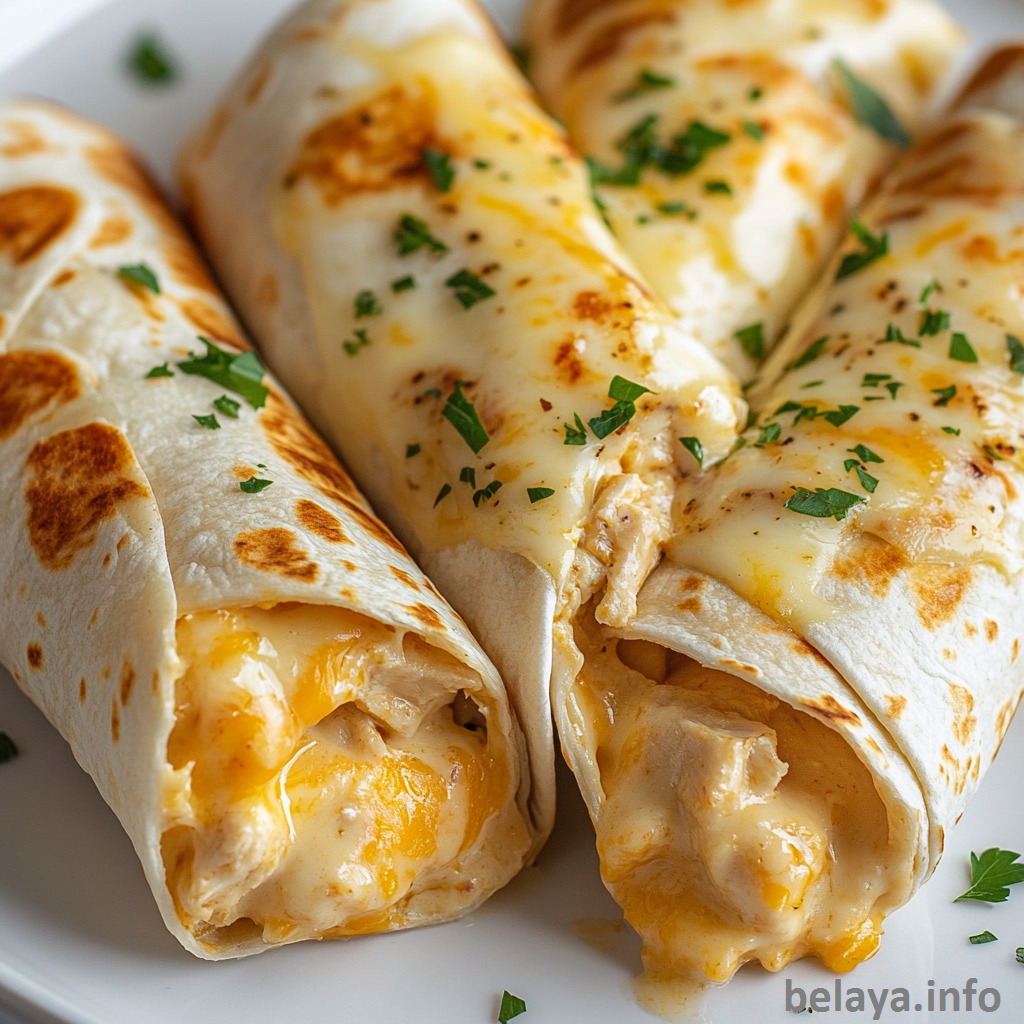
Cheesy Garlic Chicken Wraps
These Cheesy Garlic Chicken Wraps are the perfect fusion of comfort and bold flavor, all tucked into a golden, toasty tortilla.
Juicy, well-seasoned chicken pairs with a creamy garlic sauce and a rich blend of melty cheddar and mozzarella, creating a filling that’s savory, satisfying, and irresistibly cheesy.
The crispy exterior gives way to warm, garlicky goodness in every bite—making this wrap ideal for quick dinners, lunches, or late-night cravings. It’s easy to make, endlessly customizable, and guaranteed to become a go-to favorite.
Why People Will Love This Cheesy Garlic Chicken Wraps:
Bold, crave-worthy flavors: The combination of garlic, paprika, and two cheeses creates a savory, comforting flavor profile that feels indulgent yet approachable.
Golden, crispy exterior with a melty center: Toasting the wraps in a skillet creates a satisfying contrast between the crispy tortilla and the warm, gooey filling.
Quick and easy, but restaurant-quality: Despite being simple to make, the wraps taste like something you’d order at a gourmet café or food truck.
Perfectly balanced textures: Juicy chicken, smooth garlic sauce, and melted cheese are wrapped in a soft-yet-crispy tortilla—making every bite rich and layered.
Versatile for all occasions: Ideal for lunch, dinner, meal prep, or even party snacks. They’re easy to cut into halves or quarters for sharing, or packable for on-the-go meals.
Comfort food with a garlic twist: Garlic lovers will especially appreciate the bold, creamy flavor that gives the wrap its signature character—rich without being overpowering.
Key Ingredients:
Boneless, skinless chicken breasts provide lean, tender protein that soaks up the savory blend of garlic, paprika, and olive oil—forming the heart of the wrap with juicy, flavorful bites.
Garlic powder and onion powder build a warm, aromatic foundation that infuses the chicken with depth and savory richness in every bite.
Sharp cheddar and mozzarella cheeses deliver a perfect pairing—cheddar brings bold, tangy flavor, while mozzarella offers that stretchy, melty texture that makes each wrap indulgent and satisfying.
Creamy garlic sauce acts as both a binder and a flavor booster, adding luscious moisture and an intense garlicky kick that ties all the components together.
Flour tortillas serve as the crisp, golden canvas—soft enough to wrap but sturdy enough to toast to perfection and hold the cheesy, saucy filling without falling apart.
Expert Tips:
Marinate the chicken in advance for deeper flavor: Even just 30 minutes in the olive oil, garlic, and paprika mixture can help the seasonings penetrate the chicken, making it more flavorful and juicy when cooked.
Use freshly grated cheese for better melt and texture: Pre-shredded cheese contains anti-caking agents that can affect meltability. Grating your own cheddar and mozzarella will create a smoother, richer filling.
Warm the tortillas before assembling: Lightly warming the tortillas makes them more pliable and less prone to tearing when folding. This helps you achieve a tighter, cleaner wrap with fewer cracks.
Don’t overfill the wraps: A common mistake is stuffing them too full, which leads to uneven toasting or bursting. Use a balanced ratio of sauce, chicken, and cheese to ensure everything melts and heats evenly.
Press while toasting for a crisp, golden crust: Use a spatula or sandwich press to gently flatten the wraps as they cook in the skillet. This encourages even browning, helps seal the edges, and ensures the cheese melts uniformly.
Let them rest before cutting: Allow the wraps to rest for 1–2 minutes off heat before slicing. This lets the cheese settle slightly, reducing the chance of it spilling out and making for neater presentation.
Customize your creamy garlic sauce: Boost the flavor by mixing in a spoonful of grated Parmesan, chopped chives, or a squeeze of lemon juice for extra brightness.
Cheesy Garlic Chicken Wraps
Ingredients:
2 large boneless, skinless chicken breasts, diced into bite-sized pieces
1 tablespoon olive oil
2 teaspoons garlic powder
1 teaspoon onion powder
1 teaspoon smoked or sweet paprika
Salt and freshly ground black pepper, to taste
1 cup shredded sharp cheddar cheese
½ cup shredded mozzarella cheese
4 large flour tortillas (burrito size)
½ cup creamy garlic sauce, store-bought or homemade
Fresh parsley, finely chopped (optional, for garnish)
Instructions:
Prepare the Chicken
In a large bowl, mix the diced chicken with olive oil, garlic powder, onion powder, paprika, salt, and pepper. Stir well until the chicken is evenly coated with seasoning.
Cook the Chicken
Heat a large pan over medium heat. Add the seasoned chicken and cook, stirring occasionally, for 6-8 minutes, or until the chicken is browned and fully cooked. Remove from heat and set aside.
Build the Wraps
Take each tortilla and spread a layer of creamy garlic sauce over the surface. Evenly distribute the cooked chicken on top, then sprinkle cheddar and mozzarella cheese over it.
Toast the Wraps
Fold each tortilla over the filling, creating a wrap. Return them to the skillet and cook for 2-3 minutes per side, pressing lightly, until golden brown and the cheese is melted.
Serve and Enjoy
Cut in half, garnish with fresh parsley if desired, and serve while warm. Enjoy the cheesy, garlicky goodness in every bite!

Important Notes When Making Cheesy Garlic Chicken Wraps:
Chicken size and consistency matter: Dice the chicken evenly to ensure uniform cooking. Uneven sizes may result in some pieces drying out while others remain undercooked, affecting both texture and flavor.
Dry seasoning is key for fast flavor: Garlic powder, onion powder, and paprika provide intense, concentrated flavor without adding moisture—crucial when you want your chicken to brown instead of steam.
Creamy garlic sauce functions as both binder and flavor base: It not only adds a garlicky punch but also helps hold the filling together. Too little, and the wrap may taste dry; too much, and it may become soggy or hard to seal.
Toasting transforms the wrap: Skipping the final pan-toasting step means missing out on a key texture contrast. The crisp exterior locks in the melty cheese and creates that satisfying crunch with every bite.
Layer order affects bite quality: For best results, spread the sauce first, then add chicken, then cheese. This keeps the wrap structurally balanced—melty cheese near the top, juicy protein in the center, and sauce spread evenly across the base.
Resting after toasting is crucial: Cutting the wrap too soon causes the cheese and sauce to ooze out. Allowing a brief rest helps the filling set and keeps the structure intact for cleaner slicing and serving.
Optional garnishes enhance experience: A sprinkle of chopped parsley or a drizzle of extra sauce on top not only adds freshness and visual appeal but also elevates the dish from casual to café-style quality.
How To Enjoy Cheesy Garlic Chicken Wraps After Cooking:
Let Them Rest Briefly
After toasting the wraps in the skillet, allow them to rest on a cutting board for 1–2 minutes. This helps the melted cheese settle and prevents the sauce from spilling out when sliced.
Slice with Intention
Use a sharp, serrated knife to cut the wrap in half on a slight diagonal. This not only makes it easier to eat but also shows off the layers of juicy chicken, gooey cheese, and creamy sauce—boosting visual appeal.
Pair with Light Sides
Serve with a crisp side salad, roasted veggies, or a light soup to balance the richness of the wrap. A dill pickle spear or crunchy slaw also complements the garlic and cheese beautifully.
Add a Finishing Touch
Garnish with chopped parsley, chives, or a drizzle of extra garlic sauce for an elevated, café-style feel. A light squeeze of lemon adds brightness and cuts through the richness.
Serve While Warm
These wraps are best enjoyed hot off the skillet when the tortilla is crispy and the cheese is still perfectly melty. If serving later, reheat in a dry skillet over medium heat to restore texture—avoid the microwave if possible, as it can make the wrap soggy.
Pack for On-the-Go
If packing for lunch, let the wraps cool completely before wrapping in foil or parchment. Include a small container of extra sauce on the side for dipping.
Nutrition Information:
For 1 Cheesy Garlic Chicken Wrap, assuming the recipe makes 4 wraps using standard tortillas, cheese, sauce, and chicken portions:
Calories: 475 kcal | Total Fat: 25.4 g | Saturated Fat: 9.1 g | Monounsaturated Fat: 10.2 g | Polyunsaturated Fat: 2.4 g | Cholesterol: 85 mg | Sodium: 780–900 mg (depending on sauce and seasoning) | Total Carbohydrates: 30.5 g | Dietary Fiber: 1.8 g | Sugars: 2.6 g | Protein: 33.7 g
Frequently Asked Questions:
Can I make these wraps ahead of time for meal prep?
Yes. You can cook the chicken and assemble the wraps in advance. Store them in the fridge (uncooked) and toast them in a skillet just before serving for the best texture. For packed lunches, let them cool before wrapping in foil or parchment.
Can I use pre-cooked or rotisserie chicken instead?
Absolutely. Shred or dice pre-cooked chicken and mix it with the seasonings and garlic sauce before assembling. It’s a great shortcut—just be sure to reheat it briefly before building the wrap to help melt the cheese evenly.
What’s the best way to get the tortilla golden and crisp without burning it?
Toast in a dry nonstick skillet or lightly oiled pan over medium heat. Press gently with a spatula while cooking, and flip once golden. If the pan is too hot, the outside will brown before the cheese melts—so take your time.
Can I substitute the garlic sauce with something else?
Yes. Ranch, Caesar, aioli, or even a light cream cheese spread can work as alternatives. If you’re feeling bold, try a spicy mayo or herbed yogurt dressing for a twist.
How can I make this recipe a bit healthier?
Use whole wheat or low-carb tortillas, reduced-fat cheese, and grilled chicken breast. You can also reduce the amount of sauce or use a lighter version (such as Greek yogurt-based garlic sauce) to cut back on fat and calories while keeping great flavor.
How do I prevent the tortillas from tearing when rolling the wraps?
Warm the tortillas briefly before assembling—either in a dry skillet for 20 seconds per side or wrapped in a damp paper towel in the microwave for about 15 seconds. This makes them more pliable and less likely to crack or tear when folded.
Should the chicken be cooked all the way through before assembling the wrap?
Yes, absolutely. Make sure the diced chicken is fully cooked and browned before using it in the wrap. The skillet toasting step is only to crisp the wrap and melt the cheese—not to cook raw meat.
How much filling should I use per tortilla?
Aim for about ½ to ¾ cup of filling per tortilla. Overfilling makes the wrap harder to seal and toast evenly. Leave space around the edges so the cheese doesn’t ooze out during toasting.
What’s the best cheese combination for melt and flavor?
A mix of sharp cheddar and mozzarella is ideal. Cheddar provides bold, tangy flavor while mozzarella ensures a melty, stretchy texture. Always use freshly shredded cheese for the best results—pre-shredded blends can contain anti-caking agents that hinder melting.
How do I get an evenly golden crust on the wrap?
Toast in a dry or lightly oiled skillet over medium heat, and use a spatula or press to gently flatten the wrap as it cooks. Flip only once, and cook until each side is golden brown and the cheese is melted throughout—usually about 2–3 minutes per side.