Homemade Hatch Pepper Relish
There’s a special kind of alchemy that happens when you combine smoky roasted Hatch chiles, sweet onions, and ripe tomatoes with just the right balance of sugar, salt, and vinegar.
This Homemade Hatch Pepper Relish is more than a condiment—it’s a vibrant, tangy tribute to Southwestern harvests and family kitchens, where bold flavors and simple ingredients are coaxed into something unforgettable. Each spoonful offers a bright punch of heat and acidity, mellowed by the natural sweetness of slow-simmered vegetables.
Whether you’re spreading it over grilled meats, stirring it into salads, or savoring it atop a sandwich, this relish is a celebration of seasonality and tradition, bringing a taste of the sun-soaked Southwest to every table.
Why People Will Love This Homemade Hatch Pepper Relish Recipe:
Celebrates Southwestern tradition: The combination of Hatch chiles, tomatoes, and sweet onions honors the flavors and heritage of the Southwest, creating a sense of place in every bite.
Bright, bold flavor: The relish delivers a perfect balance of heat, sweetness, tang, and savoriness, awakening the palate and complementing a wide variety of dishes.
Versatile and creative: This relish is more than a condiment—it can transform burgers, sandwiches, tacos, grilled meats, and even eggs or salads into something special and memorable.
Homemade authenticity: The process of roasting, simmering, and blending simple, fresh ingredients gives the relish a depth and complexity you can’t find in any store-bought jar.
A celebration of harvest: Made with seasonal chiles and tomatoes, each batch captures the sun-ripened abundance of late summer, preserving it to enjoy all year long.
Key Ingredients:
Hatch green chiles: Grown in the rich soils of the Southwest, these chiles offer a smoky, gentle heat and a signature earthiness that anchors the entire relish, lending both complexity and a taste of tradition.
Fresh tomatoes: Ripe and juicy, tomatoes bring natural sweetness and acidity, their flesh breaking down to create a luscious body for the relish while tempering the spice of the chiles.
Sweet onion: With its mild, subtle bite, sweet onion adds delicate flavor and balance, rounding out the sharpness of the vinegar and the punch of the peppers.
Vinegar: More than just a preservative, vinegar imparts a bright tang that cuts through the richness and brings all the flavors into sharp focus.
Sugar and salt: These simple pantry staples are the invisible hands that tie everything together, enhancing the vegetables’ natural flavors and ensuring a harmonious, craveable finish in every spoonful.
Expert Tips:
Roast the chiles for depth: Roasting Hatch chiles over an open flame or under the broiler until blistered and charred brings out their natural smokiness and adds a subtle complexity you can’t achieve with raw peppers.
Peel and seed with care: After roasting, peel the chiles while they’re still warm and remove most seeds for a smoother texture and balanced heat—leaving a few seeds if you want extra kick.
Balance your acid: The amount of vinegar can make or break your relish. Taste as you go—add just enough to brighten and preserve without overpowering the flavors of the vegetables.
Simmer slowly: Allowing the mixture to simmer gently for at least an hour helps the flavors meld and the texture develop into a spoonable, cohesive relish. Rushing this step may leave the relish watery or harsh.
Blend to your preferred consistency: For a rustic relish, use a potato masher or briefly pulse with an immersion blender. For a smoother, spreadable condiment, blend more thoroughly—just be careful not to overdo it if you like a bit of chunkiness.
Taste and adjust at the end: The intensity of chiles and tomatoes can vary each batch; don’t hesitate to tweak salt, sugar, or vinegar in the last few minutes of simmering to achieve your ideal balance.
Follow proper canning practices: If preserving for later, always use sterilized jars and a proper water bath process to ensure food safety and shelf stability.
Homemade Hatch Pepper Relish
Ingredients
2 pounds roasted, peeled Hatch medium green chiles (or similar green chile peppers)
2 pounds fresh tomatoes, quartered
1 large sweet onion, peeled and cut into ½-inch wedges
½ cup granulated sugar
3 teaspoons salt (or to taste)
Vinegar (enough to cover the vegetables in the pot)
Instructions
Prep the Vegetables:
Roast the Hatch chiles until the skins are blistered, then peel and seed them.
Quarter the tomatoes and cut the sweet onion into chunky wedges.
Combine Ingredients:
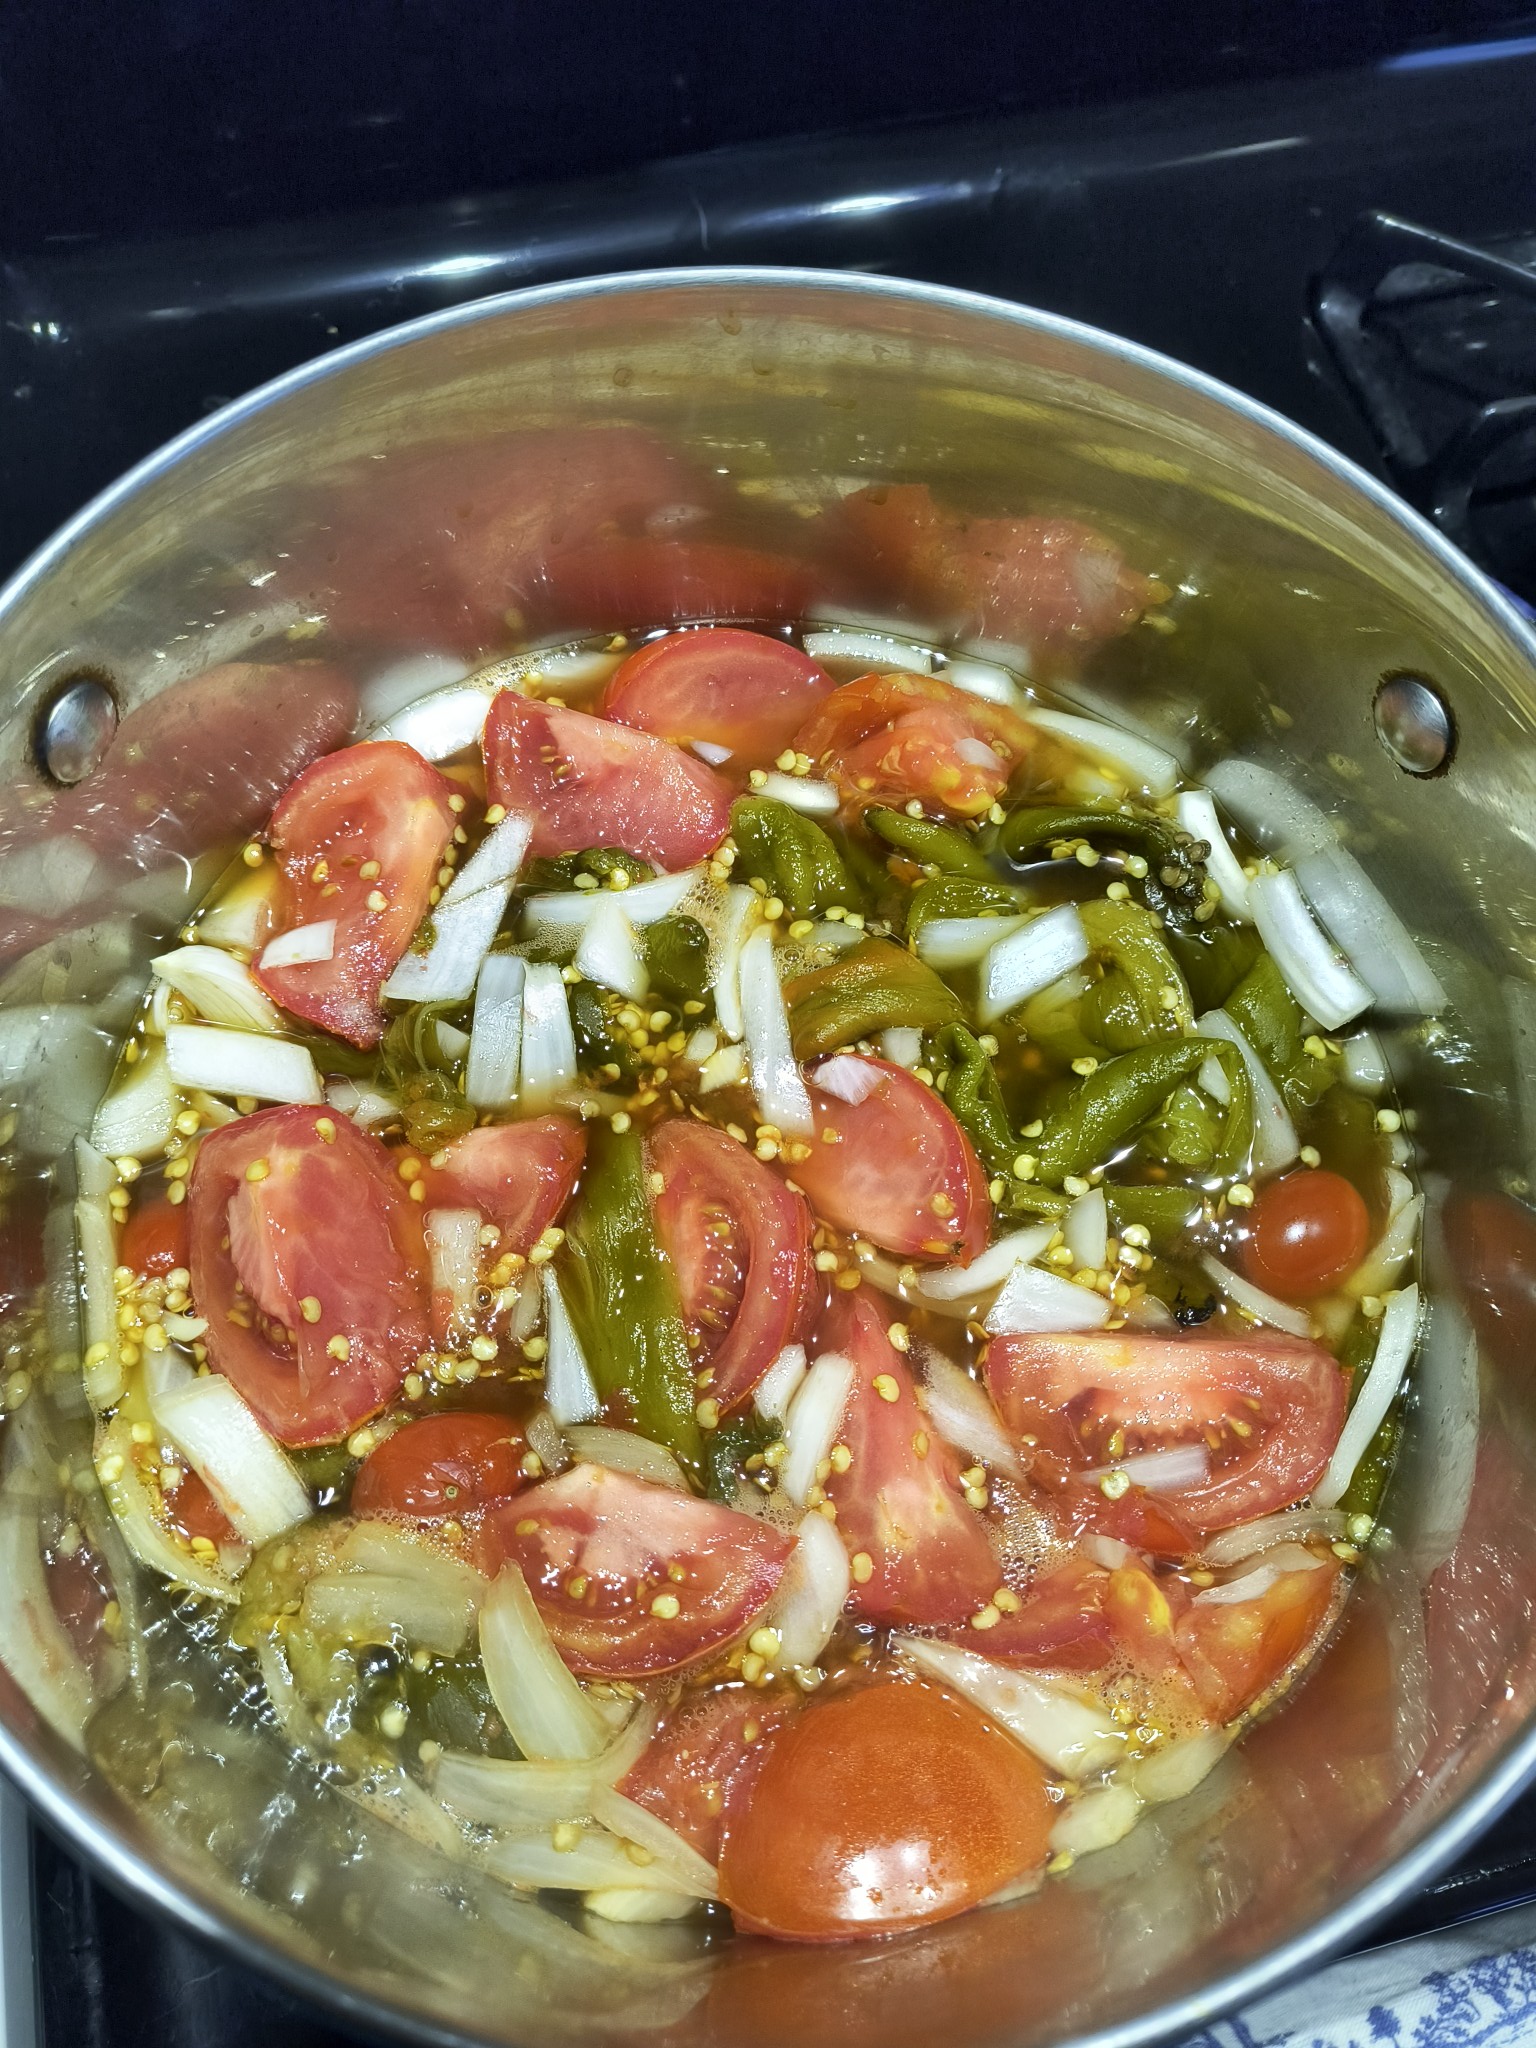
Place the prepared chiles, tomatoes, and onion in a large, non-reactive pot.
Add ½ cup sugar and 3 teaspoons salt.
Pour in enough vinegar to just cover all the vegetables.
Cook the Relish:
Bring the mixture to a boil over medium-high heat, stirring occasionally.
Once boiling, reduce heat to a gentle simmer.
Simmer uncovered for 1–2 hours, stirring occasionally, until the vegetables are very tender and the flavors meld together.
Blend (Optional):
For a finer relish, use an immersion blender or wand mixer to break up any large pieces, achieving your desired texture.
Taste and Adjust:
Taste for seasoning, adding more salt, sugar, or vinegar as needed.
Canning (Optional):
If you’d like to preserve your relish, ladle it hot into sterilized canning jars, leaving ½-inch headspace. Wipe rims, apply lids, and process in a boiling water bath for 10–15 minutes, depending on jar size and altitude.
Cool and Store:
Allow jars to cool. Check seals and store in a cool, dark place. Refrigerate any unsealed jars and use within a few weeks.
Serving Suggestions
Use as a condiment on burgers, hot dogs, or bratwurst.
Spoon over grilled chicken, fish, or pork.
Stir into eggs, tacos, or grain bowls for a spicy, tangy kick.
Pile onto sandwiches or mix into salads for a burst of flavor.
Important Notes When Making Homemade Hatch Pepper Relish:
Freshness matters: Use the freshest Hatch chiles, tomatoes, and onions you can find. The depth and vibrancy of the relish depend on the quality and ripeness of these key ingredients.
Roasting is essential: Roasting the Hatch chiles not only softens them for easier peeling but also concentrates their flavor, imparting the smoky, nuanced character that makes this relish special.
Mind the vinegar: The type and amount of vinegar will influence both the flavor and the shelf life of your relish. White vinegar offers a clean tang, while apple cider vinegar can add subtle sweetness—adjust to suit your preference and always use enough to ensure safe preservation if canning.
Simmering time: Don’t rush the simmer—slow cooking allows the sugar and vinegar to mellow, the vegetables to release their juices, and all the flavors to harmonize into a balanced, cohesive condiment.
Preserve with care: If you plan to can the relish, follow safe canning protocols: sterilize your jars, use the right vinegar concentration, and process in a boiling water bath to prevent spoilage and preserve the vibrant taste.
Texture is personal: The final consistency is up to you—blend until smooth for a spread or leave some chunks for a rustic, spoonable relish. Both ways, the flavor will shine through.
How To Enjoy Hatch Pepper Relish After Cooking
Let it cool and meld: After simmering, let the relish cool to room temperature. This resting period allows the flavors to deepen and mingle, enhancing the complexity of every bite.
Stir before serving: Give the relish a good stir to distribute the juices and ensure an even texture, whether it’s rustic and chunky or smooth and spreadable.
Start simple: Taste a spoonful on its own. Notice the gentle heat of the Hatch chiles, the sweetness of tomato and onion, and the tangy brightness from the vinegar.
Use as a condiment: Spoon it over grilled sausages, burgers, hot dogs, or bratwurst—the relish brings out the smoky flavors and adds a vibrant, tangy contrast.
Elevate mains: Pair it with roasted chicken, pork chops, or grilled fish for a burst of color and flavor that turns everyday proteins into something memorable.
Brighten breakfast: Stir a little into scrambled eggs, fold into breakfast tacos, or spoon onto avocado toast for a spicy, savory kick to start your day.
Enhance sides and salads: Add a dollop to grain bowls, potato salad, or fresh greens for a pop of acidity and a hint of spice.
Entertain with flair: Set out a jar as part of a cheese or charcuterie board—its sweet-heat profile is an ideal companion for sharp cheddar, creamy goat cheese, or cured meats.
Relish the leftovers: Store extra relish in the fridge or pantry (if canned). The flavors will deepen over time, making each subsequent serving even more delicious.
Nutrition Information:
For one serving of Homemade Hatch Pepper Relish (assuming about 16 servings per batch):
Calories: 30 kcal | Total Fat: 0.2 g | Saturated Fat: 0 g | Monounsaturated Fat: 0 g | Polyunsaturated Fat: 0 g | Cholesterol: 0 mg | Sodium: 180–220 mg (depending on added salt and vinegar) | Total Carbohydrates: 7.1 g | Dietary Fiber: 1.5 g | Sugars: 4.4 g | Protein: 0.8 g
Frequently Asked Questions:
Can I use other types of peppers if I can’t find Hatch chiles?
Yes! While Hatch chiles are traditional and provide a unique flavor, you can substitute with Anaheim, poblano, or other mild to medium green chiles. Adjust for heat and flavor to suit your taste.
How long will the relish keep in the refrigerator?
If not canned, store the relish in an airtight container in the refrigerator for up to 2 weeks. The flavors will continue to develop and deepen as it sits.
Is it necessary to peel the roasted peppers before making the relish?
Peeling is highly recommended. Removing the skins gives the relish a smoother texture and eliminates any bitterness or toughness that might distract from the final flavor.
Can I adjust the sweetness or acidity of the relish?
Absolutely. Taste the relish near the end of simmering and adjust the sugar or vinegar as needed. The goal is a harmonious balance of sweet, tangy, and spicy to match your preferences.
What’s the best way to can this relish for long-term storage?
Sterilize your jars and lids, ladle the hot relish into jars leaving ½-inch headspace, wipe the rims, seal, and process in a boiling water bath for 10–15 minutes. Allow jars to cool and check the seals before storing in a cool, dark place. Proper canning will keep your relish safe for several months.
Do I need to roast the Hatch chiles before making the relish?
Yes, roasting the chiles is important. It enhances their natural smokiness, softens the skins for easy peeling, and adds deep, rich flavor to the relish. Skipping this step will result in a much milder, less complex condiment.
How do I know how much vinegar to use?
Add enough vinegar to just cover the vegetables in your pot. The amount may vary depending on your pan and how tightly you pack the ingredients. The vinegar both preserves and balances the relish, so taste as you go and adjust for your preferred tanginess.
Can I blend the relish completely smooth?
Absolutely! Use an immersion blender or countertop blender for a smoother, more spreadable relish. For a chunkier, more rustic texture, pulse briefly or simply mash with a potato masher.
Should I adjust the salt or sugar levels if my tomatoes or chiles are especially sweet or tart?
Yes. Always taste the relish near the end of cooking and adjust the salt, sugar, or vinegar to achieve your ideal balance of sweet, tangy, and savory. Every batch of vegetables is a little different.
Is it safe to water-bath can this relish, and how do I do it?
Yes, as long as you use enough vinegar (at least 1:1 with th
e vegetables by volume), water-bath canning is safe. Process hot, sterilized jars of relish in boiling water for 10–15 minutes, depending on your altitude and jar size. Always follow trusted canning guidelines for food safety.