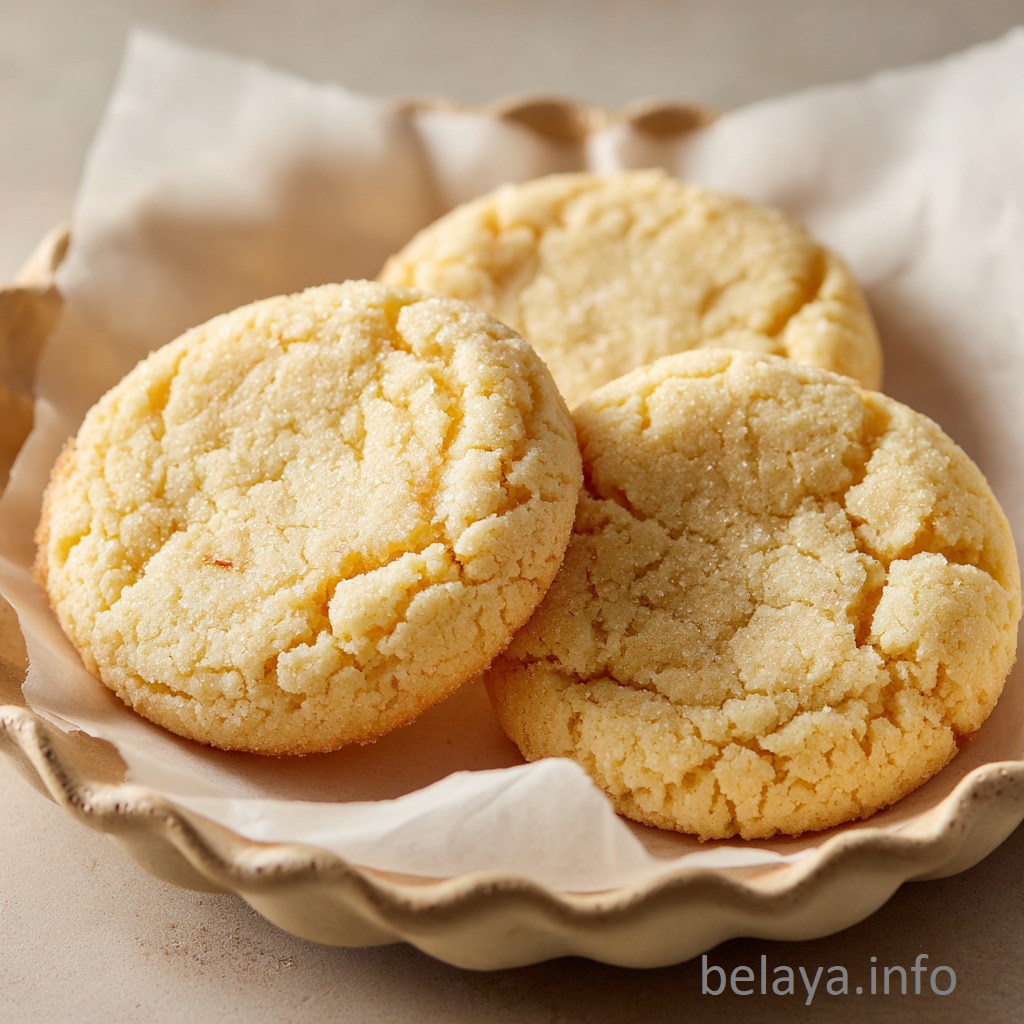
Chicago Public School Butter Cookies
These cookies are more than just a sweet treat—they’re a piece of childhood nostalgia wrapped in buttery perfection.
Originating from the kitchens of Chicago’s public schools, they were once a treasured reward that could brighten even the coldest Midwestern afternoon. Each bite carries the unmistakable aroma of pure vanilla, the tender crumble of perfectly creamed butter, and the warmth of simple ingredients done right.
They’re not flashy, but they are timeless—honest, comforting, and deeply satisfying, the kind of cookie that reminds you of home, no matter where you are.
Why People Will Love Chicago Public School Butter Cookies:
Nostalgic comfort in every bite – These cookies carry the taste and aroma that instantly transport people back to warm school cafeterias and carefree childhood afternoons.
Pure, uncomplicated flavor – With just butter, sugar, vanilla, and flour, the recipe delivers a clean, honest sweetness without artificial distractions.
Buttery melt-in-your-mouth texture – The creaming method and balanced flour ratio create a delicate crumb that dissolves luxuriously on the tongue.
Universally appealing – Loved by all ages, these cookies fit effortlessly into any occasion—whether it’s a holiday tray, a coffee break, or a simple after-school treat.
Timeless tradition – Baking them is as much about honoring a piece of local culinary history as it is about enjoying a delicious dessert.
Key Ingredients
Unsalted Butter – The heart of the recipe, delivering a velvety richness and creamy mouthfeel. Using a full pound is unapologetic indulgence, ensuring every bite melts luxuriously on the tongue.
Granulated Sugar – The sweetness is straightforward yet perfectly balanced, allowing the butter’s natural flavor to shine without overpowering it.
Pure Vanilla Extract – The soul of the cookie, adding warmth, depth, and that nostalgic bakery aroma that lingers long after baking.
Fine Salt – A subtle but essential enhancer, sharpening flavors and balancing the sweetness to keep the cookies from feeling heavy.
All-Purpose Flour – The structure-builder, creating that tender yet sturdy crumb that holds its shape while crumbling delicately in the mouth.
Expert Tips:
Let the Butter Speak – Start with truly room-temperature butter—not melted, not cold. This ensures effortless creaming with the sugar, creating microscopic air pockets that give the cookies their signature lightness while preserving their melt-in-your-mouth texture.
Don’t Rush the Creaming Stage – Spend at least 3–5 minutes blending butter and sugar until pale and fluffy. This step builds structure without density, allowing the butter flavor to fully bloom.
Handle the Dough Gently – Once you add flour, mix only until it disappears into the dough. Overmixing will develop gluten, leading to tough cookies instead of tender, buttery bliss.
The Chill Factor – Chilling the shaped dough is not just for appearance—it relaxes the gluten, concentrates flavor, and prevents the cookies from spreading too much in the oven, preserving their old-school look.
Bake by Color, Not Just Time – Ovens vary, so watch for edges that turn the faintest golden hue. Pulling them at the perfect moment keeps the centers soft while locking in that rich butter aroma.
Chicago Public School Butter Cookies
Ingredients
1 pound (454 g) unsalted butter, softened to room temperature for easy mixing
1 cup (200 g) granulated sugar, for a perfectly balanced sweetness
2 tablespoons pure vanilla extract, for a rich, fragrant flavor
½ teaspoon fine salt, to enhance and balance the sweetness
4 cups (480 g) all-purpose flour, measured correctly for the best texture
Instructions:
Cream the butter and sugar – In a large mixing bowl, beat the softened butter and granulated sugar together until the mixture is light, fluffy, and completely smooth with no lumps.
Incorporate the vanilla – Scrape down the sides and bottom of the bowl with a spatula to ensure even mixing. Add the vanilla extract and blend until fully combined.
Add dry ingredients – Gradually mix in the salt and flour, stirring just until no visible streaks of flour remain. Avoid overmixing to keep the cookies tender.
Portion the dough – Using an ice cream scoop or a large spoon, divide the dough into 24 equal portions. Each dough ball should be about the size of a small tangerine.
Shape the cookies – Place each dough ball on a tray and press down gently on the top with three fingers, leaving visible indentations. Repeat with all remaining portions.
Chill – Transfer the tray to the refrigerator and chill the shaped cookies for at least 1 hour to help them hold their shape during baking.
Preheat the oven – Once the cookies are chilled, preheat your oven to 375°F (190°C). Line two large baking sheets with parchment paper and set aside.
Arrange for baking – Place the cookies on the prepared sheets, leaving 2–3 inches of space between each one to allow for spreading.
Bake – Bake for 15–18 minutes, or until the edges turn a light golden brown.
Cool – Let the cookies rest on the baking sheet for 5 minutes, then transfer them to a wire rack to cool completely before serving.
Important Notes When Making Chicago Public School Butter Cookies
Precision Matters – Weighing your flour and butter ensures the proper ratio of fat to dry ingredients, which is key to achieving the cookies’ iconic tender crumb without being greasy.
Pure Ingredients, Pure Flavor – This recipe shines because of its simplicity, so use real unsalted butter, pure vanilla extract, and fresh flour. Any shortcuts here will noticeably affect flavor and texture.
Room Temperature Consistency – All ingredients—especially butter—should be at the same moderate temperature for even blending. Cold butter resists mixing; overly soft butter can lead to spreading.
Shaping Consistency – Uniform dough portions and even finger indentations not only create a nostalgic visual but also ensure every cookie bakes at the same rate.
Cooling is Crucial – Letting cookies rest briefly on the baking sheet before transferring to a rack allows residual heat to finish the bake gently, locking in a tender center while preventing breakage.
Storage Wisdom – Store cooled cookies in an airtight container at room temperature for up to a week. For longer storage, freeze in a single layer before transferring to a freezer-safe bag to maintain texture and flavor.
How To Enjoy Chicago Public School Butter Cookies After Baking:
Let the Aroma Set the Stage
As the cookies cool, let the buttery, vanilla-rich scent fill your kitchen. This is part of the enjoyment—allow yourself a moment to simply stand near the cooling rack and breathe in that nostalgic warmth before you take the first bite.
Taste Them in Their Purest Form
Enjoy your very first cookie plain, without any accompaniments. This lets you experience the balance of buttery richness, tender crumb, and lightly golden edges exactly as intended—just like the ones served in Chicago school cafeterias decades ago.
Pair with the Right Beverage
Classic Pairing: A cold glass of milk for a creamy contrast that complements the butteriness.
Warm Comfort: Freshly brewed coffee or black tea to cut the richness with a subtle bitterness.
Kid-Friendly Treat: Hot chocolate for a sweeter, more indulgent match.
Experience Temperature Contrast
Try one cookie still slightly warm so the center is soft and melts in your mouth. Then, later in the day, have one fully cooled—the texture will be more defined and pleasantly crumbly.
Make it a Social Moment
These cookies are a sharing dessert at heart. Arrange them on a vintage-style platter or parchment-lined basket and serve them during a coffee break, afternoon tea, or as a surprise after-school treat. Part of the joy is watching someone’s face light up with recognition if they’ve had them before.
Add Gentle Enhancements (Optional)
If you want to dress them up without losing their character:
- Dust lightly with powdered sugar for a delicate sweetness.
- Drizzle with melted chocolate for a holiday or special occasion touch.
- Serve alongside fresh berries to add brightness and color.
Store for Future Moments
Place cooled cookies in an airtight tin at room temperature to preserve their buttery tenderness. If storing longer than 5 days, freeze in a single layer before transferring to a freezer bag—then rewarm in a low oven for that fresh-baked feel.
Nutrition Information
For Chicago Public School Butter Cookies based on yield of 24 cookies:
Calories: 235 kcal | Total Fat: 15.5 g | Saturated Fat: 9.8 g | Monounsaturated Fat: 4.3 g | Polyunsaturated Fat: 0.6 g | Cholesterol: 41 mg | Sodium: 59 mg | Total Carbohydrates: 22.3 g | Dietary Fiber: 0.7 g | Sugars: 8.3 g | Protein: 2.8 g
Frequently Asked Questions:
What makes these cookies taste different from regular butter cookies?
The Chicago Public School version stands out for its generous butter ratio and high vanilla content, which gives a richer aroma and a softer melt-in-your-mouth crumb.
Unlike crisp European butter cookies, these are slightly denser, tender, and subtly sweet, designed for everyday enjoyment rather than an overly rich dessert.
The three-finger indent is also a nostalgic marker tied to the school tradition, making them as much about memory and comfort as flavor.
Why is it important to cream the butter and sugar thoroughly?
Proper creaming incorporates air into the butter, giving the cookies a lighter texture while evenly dispersing sugar for balanced sweetness. If under-creamed, the cookies can become dense, heavy, or uneven in texture.
Aim for a pale, fluffy mixture—this means the butter is aerated enough to produce that signature soft-yet-sturdy bite.
How can I keep the flavor authentic if I need to substitute ingredients?
If you can’t use pure vanilla extract, choose high-quality vanilla paste or a concentrated vanilla essence—artificial vanilla can alter the nostalgic taste.
For dairy-free versions, a vegan butter block (not margarine) works best to maintain richness, though the texture may be slightly softer. Avoid reducing butter, as it’s the structural and flavor foundation of this recipe.
Can I adjust the size of the cookies without affecting the texture?
Yes, but the baking time must be carefully adjusted. Smaller cookies (½ the dough size) will need about 9–12 minutes, while larger cookies (1½–2 times bigger) may require 18–22 minutes.
Watch for color cues—edges should be lightly golden, not brown—since overbaking will make them crumbly instead of tender.
How can I recreate the “freshly baked school cafeteria” experience at home?
Serve the cookies slightly warm, within an hour of baking, for the full nostalgic effect. The warmth releases the buttery aroma and softens the center slightly. Pair with a cold glass of milk or hot cocoa to mimic the classic cafeteria pairing.
For extra authenticity, store them loosely covered for a few hours after baking—this softens the exterior just like in the school lunch trays.
Why is the creaming stage critical for the cookie’s signature texture?
The creaming process not only blends butter and sugar—it incorporates microscopic air bubbles into the dough. These bubbles expand in the oven, giving the cookies a delicate lift while keeping the crumb tender.
Under-creaming leads to dense, heavy cookies, while over-creaming can cause excessive spread. Aim for a pale, fluffy mixture that clings lightly to the bowl.
How does flour measurement accuracy affect texture and spread?
A slight excess of flour can make these cookies crumbly and dry, while too little causes them to spread thin.
Always measure using the spoon-and-level method (lightly spoon flour into the cup, then level off), or better yet, weigh it for precision (480 g). In a butter-heavy recipe like this, precision is the difference between café-perfect and cafeteria-disaster.
Can the flavor deepen without adding more vanilla?
Yes—aging the dough in the refrigerator for 24–48 hours before baking allows the flour’s proteins to break down slightly and the fat to absorb more aromatic compounds.
This leads to a richer, more nuanced flavor and slightly darker bake. It’s a technique often used in artisan bakeries for shortbread-style cookies.
Why do my cookies lose the iconic “three-finger indent” while baking?
If the butter is too warm when baking starts, the cookies spread before the structure sets, softening the indent. To preserve the pattern:
- Chill dough at least 1 hour (2–3 hours is better).
- Press the indent deeper than you think necessary—it will rise slightly in the oven.
- Bake on a fully preheated, heavy-gauge baking sheet for more controlled heat transfer.
How can I maintain their texture for days without losing authenticity?
The Chicago Public School version had a soft bite with a delicate crumb. To keep that:
- Store in a loosely covered container for the first few hours to allow gentle moisture redistribution.
- Then transfer to an airtight container lined with parchment to prevent sticking.
- For long storage, freeze baked cookies in a single layer, then stack with parchment between layers to avoid compression.