Mom’s Classic Chili
There are recipes that fill your stomach, and then there are recipes that fill your home — this chili belongs to the latter. Mom’s Classic Chili is the kind of dish that carries stories, pulling together simple ingredients and slow-simmered comfort into one pot of warmth.
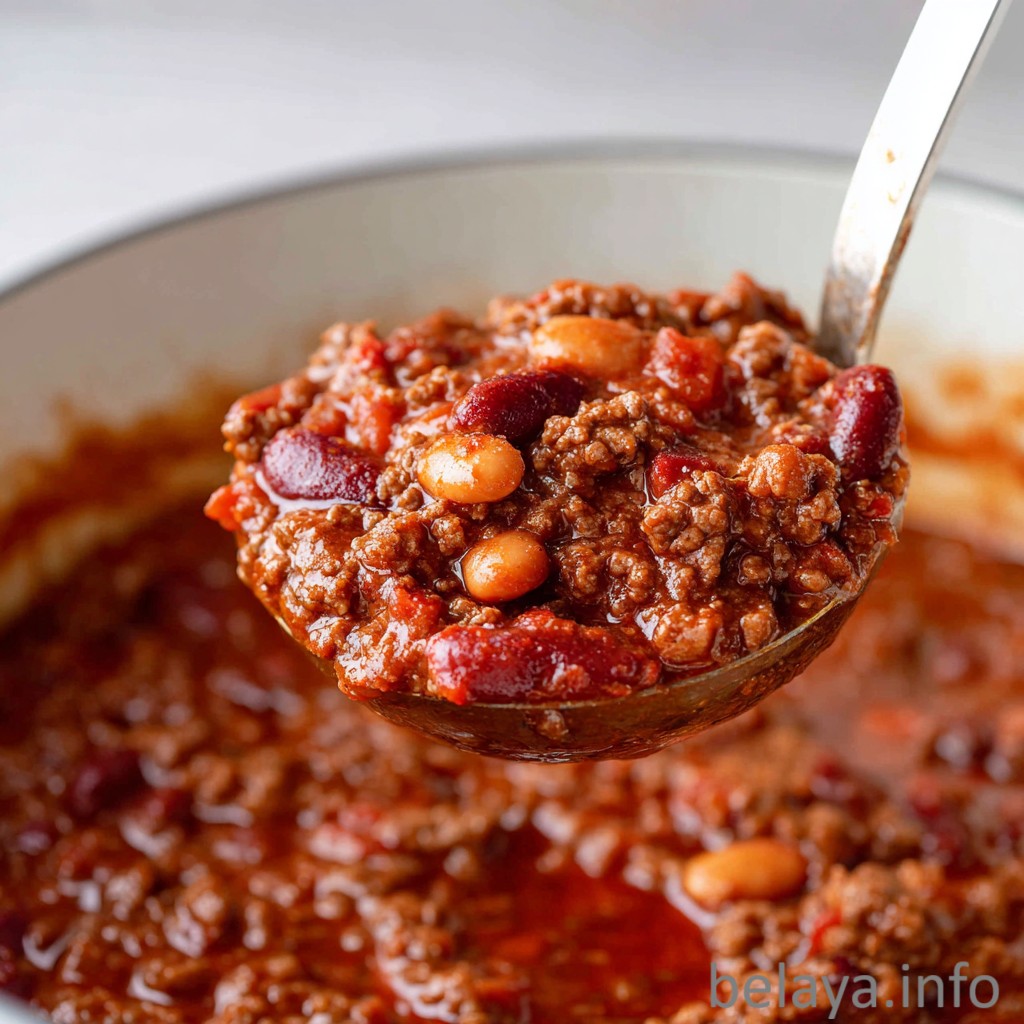
With layered spices, tender ground beef, and hours of gentle cooking, it delivers a depth of flavor that can only come from patience and love.
It’s the kind of chili that tastes like childhood memories, busy kitchens, and family gathered around the table, waiting for that first comforting spoonful.
Why People Will Love Mom’s Classic Chili:
It embodies true comfort, the kind that comes from slow-simmered flavors filling the home with warmth and anticipation.
It carries a sense of nostalgia, reminding people of family kitchens, shared meals, and recipes passed down with care.
It delivers rich, layered flavor, built from hours of gentle cooking, melding spices, tomatoes, onions, and tender beef into something soulful.
It’s deeply satisfying and hearty, the kind of meal that brings comfort on cold days, long days, or days when a warm bowl can lift the spirit.
It’s customizable and forgiving, allowing each cook to adjust the heat, the beans, or the toppings to match their own family’s traditions.
It brings people together, turning a simple pot of chili into a shared experience — one ladle at a time.
It’s a recipe that feels like home, restoring, grounding, and offering a sense of belonging with every warm spoonful.
Key Ingredients
Ground Beef & Ground Chuck – The foundation of this chili’s heartiness, bringing depth, richness, and the savory comfort that only slow-simmered beef can offer.
Twin Onions (Yellow & White) – Layers of sweetness and aroma that build the soul of the chili, creating a base that feels both familiar and deeply grounding.
Fresh Jalapeño – A spark of gentle heat that awakens the pot, adding character without overpowering the warmth of the dish.
Diced Tomatoes & Tomatoes with Green Chiles – Bright, robust acidity that balances the richness of the meat, bringing freshness and complexity to every spoonful.
Chili Powder, Cumin & Garlic Powder – The holy trinity of chili spices, slowly infusing the pot with warmth, smokiness, and the deep, earthy flavor that defines a true classic chili.
Pinto Beans (Optional) – A comforting addition that adds texture, body, and balance, turning the chili into an even more satisfying and complete meal.
Expert Tips
Brown the meat deeply, not quickly. Let the beef develop a rich, caramelized crust before moving on — this single step builds the foundation of the chili’s flavor and adds a depth you can’t create later.
Use both onions for layered aroma. The combination of yellow and white onions creates a subtle sweetness and complexity that a single onion variety can’t match.
Toast the spices briefly. After adding chili powder, cumin, and garlic powder, give them a minute to bloom in the heat. This awakens their oils and intensifies the warm, earthy character of the chili.
Let the chili truly simmer for hours. The long, unhurried cooking time is not optional — it’s where the magic happens. Slow simmering blends the spices, softens the tomatoes, and transforms the meat into tender, melt-in-your-mouth richness.
Avoid thinning it too early. As the chili cooks, moisture evaporates and the flavors concentrate. Resist the urge to add extra broth or water until the final hour, if needed.
Add beans only at the end. If you’re using beans, introduce them during the last hour of simmering. This keeps them intact and prevents them from turning mushy.
Taste throughout the final hour. Chili evolves as it cooks. Adjust salt, pepper, or heat near the end to bring everything into perfect harmony.
Let it rest off the heat. A short rest before serving allows the spices to mellow and the flavors to settle, making the chili even more rounded and comforting.
Serve with contrasting textures. Toppings like cheese, onions, cilantro, and Fritos aren’t just extras — they add brightness, crunch, and creaminess that elevate every bowl.
Mom’s Classic Chili
Ingredients
2 lbs ground beef
1 lb ground chuck
2 tablespoons extra-virgin olive oil
1 yellow onion, chopped
1 white onion, chopped
1 jalapeño, diced
1 (28 oz) can diced tomatoes
1 (10 oz) can diced tomatoes with green chiles (such as Rotel)
1½ teaspoons hot pepper sauce (like Tabasco)
¼ cup chili powder
2 teaspoons ground cumin
2 teaspoons garlic powder
1 teaspoon kosher salt
2½ teaspoons freshly ground black pepper
1 (15 oz) can pinto beans, undrained (optional)
For Serving
Shredded cheese
Chopped onions
Sour cream
Fresh cilantro
Fritos or corn chips
Instructions:
1. Brown the Meat
In a large skillet, cook the ground beef and ground chuck over medium-high heat, breaking the meat apart with a wooden spoon as it browns.
Work in batches if necessary to avoid overcrowding.
Cook for 5–7 minutes, then set the cooked meat aside.
2. Sauté the Aromatics
In a large stockpot, heat the olive oil over medium-high heat.
Add the chopped yellow onion, white onion, and diced jalapeño.
Sauté for 3–5 minutes until softened and fragrant.
3. Build the Chili Base
Stir the browned meat into the pot.
Add the diced tomatoes, the tomatoes with green chiles, hot pepper sauce, chili powder, cumin, garlic powder, salt, and black pepper.
Mix everything thoroughly.
4. Simmer the Chili
Bring the mixture to a gentle boil.
Once boiling, reduce the heat to low and let it simmer uncovered for 3 hours, allowing the flavors to deepen and meld together.
5. Add the Beans (Optional)
If using pinto beans, pour them in — liquid and all.
Continue simmering on low for 1 more hour to thicken the chili and integrate the beans.
6. Finish and Serve
Taste and adjust seasoning with more salt and pepper as needed.
Serve hot with your favorite toppings: cheese, onions, sour cream, cilantro, or Fritos.
Important Notes When Making Mom’s Classic Chili
Quality of meat matters. Using both ground beef and ground chuck gives this chili its signature richness. Chuck brings a higher fat content and deeper flavor, creating a base that becomes more tender as it simmers for hours.
Don’t rush the browning. Proper browning—not just cooking—develops the savory depth that defines a great chili. If the meat steams instead of browns, you miss out on layers of flavor that cannot be recovered later.
Onions are the backbone of the pot. Two types of onions create a balance of sweetness, sharpness, and aroma. They dissolve gently into the broth during the long simmer, turning into part of the chili’s soulful foundation.
Spices need time to open. Chili powder, cumin, and garlic powder transform only when given heat and time. The long simmer allows the spices to meld into the sauce instead of tasting raw or harsh.
Avoid over-simmering after adding beans. If using pinto beans, add them during the final hour only. Cooking them too long can cause them to break down and thicken the chili beyond what you want.
Simmer uncovered unless you need more liquid. Keeping the pot uncovered allows the chili to reduce slowly and intensify. If you prefer a looser chili, cover it partially during the final hour.
Season at the end with intention. Salt, pepper, and hot sauce become stronger as the chili cooks. Taste during the last 20–30 minutes so the final seasoning is balanced, not overwhelming.
Chili always tastes better the next day. Let leftovers rest in the fridge overnight. The flavors deepen, mellow, and create an even more satisfying bowl the second time around.
How to Enjoy Mom’s Classic Chili After Cooking
Let the chili rest before serving.
When the pot comes off the heat, give it a quiet moment to settle. This short pause allows the spices to relax, the flavors to round out, and the entire pot to thicken naturally into a rich, velvety bowl of comfort.
Start with a warm bowl.
Chili tastes fuller and more aromatic when placed into a pre-warmed bowl. It keeps the heat longer and enhances the experience of slow, intentional eating.
Layer your toppings thoughtfully.
Add shredded cheese first so it melts into the surface. Follow with fresh onions or cilantro for contrast, then finish with a spoonful of sour cream or a handful of Fritos for a satisfying crunch. Each topping adds its own texture and temperature, turning every bite into a small journey.
Taste it slowly and intentionally.
Let the warmth spread, both in flavor and comfort. Notice how the onions melt into sweetness, how the cumin drifts through the background, how the beef becomes tender from its long simmer. Chili rewards those who take their time.
Pair it with something simple.
Serve with warm cornbread, crusty bread, or even plain rice. These mild sides create balance and help highlight the chili’s bold richness without competing with it.
Customize each bowl.
Some like more heat, others prefer more crunch; let each person build their own bowl. A splash of hot sauce, extra jalapeño, more cheese—customization makes the meal feel personal and warm.
Let leftovers become a new experience.
Chili deepens after a night in the fridge. Reheat it gently to preserve its texture, and enjoy the intensified spices, richer broth, and beautifully married flavors that only time can create.
Share it generously.
Chili is a dish meant for big pots, open tables, and long conversations. Enjoy it with the people you love — it brings warmth not only to the body, but to the room.
Nutrition Information:
For Mom’s Classic Chili (based on 1 serving = 1/8 of the pot).
Calories: 480 kcal | Total Fat: 30 g | Saturated Fat: 11 g | Monounsaturated Fat: 13 g | Polyunsaturated Fat: 2 g | Cholesterol: 115 mg | Sodium: 750–900 mg (varies with added salt + canned ingredients) | Total Carbohydrates: 18 g | Dietary Fiber: 4 g | Sugars: 6 g | Protein: 34 g
Frequently Asked Questions
Can I make this chili in a slow cooker instead of on the stovetop?
Yes. Brown the meat and sauté the onions and jalapeño first, then transfer everything to a slow cooker. Cook on LOW for 6–8 hours or HIGH for 3–4 hours. Add the beans during the final hour so they don’t become mushy.
How spicy is this chili, and how can I adjust the heat?
This recipe has a gentle to moderate heat level. To reduce heat, remove the jalapeño seeds or use only half a pepper. To increase heat, add more jalapeño, a pinch of cayenne, or extra hot pepper sauce.
Can I prepare this chili ahead of time?
Absolutely — chili tastes even better the next day as the flavors deepen. Store in the fridge for up to 4 days, or freeze for up to 3 months. Reheat gently on the stovetop for best texture.
What if I don’t want to use beans?
Leave them out with no changes to the recipe. The chili will be thicker and richer. If you prefer extra body, you can add an additional ½ pound of ground beef or a small amount of tomato sauce.
How can I keep the chili from becoming greasy?
If using higher-fat meat, skim off excess fat after browning or after the first hour of simmering. This keeps the flavor deep while preventing the chili from feeling heavy.
Do I really need to simmer the chili for several hours?
Yes. The long simmer is what transforms this recipe from simple ingredients into deep, rounded flavor. The spices mellow, the tomatoes break down, and the meat becomes tender. Skipping the long simmer will give you a much flatter, less developed chili.
Why should I brown the meat in batches instead of all at once?
Overcrowding the skillet causes the meat to steam instead of brown. Browning develops caramelized bits on the meat, which add tremendous depth to the chili. Working in batches ensures maximum flavor.
When should I adjust the seasoning?
Season lightly early on, then adjust during the last 20–30 minutes of cooking. Chili evolves as it simmers, and the salt level intensifies over time. Waiting until the end helps you avoid over-seasoning.
How do I prevent the chili from burning or sticking to the bottom of the pot?
Use a heavy-bottomed pot or Dutch oven and keep the heat low during the long simmer. Stir occasionally—especially during the first hour—so the spices and tomatoes don’t settle and scorch.
Can I make this chili thicker or thinner depending on my preference?
Yes.
For thicker chili, simmer uncovered the entire time or add a bit more chili powder.
For thinner chili, partially cover the pot or add a splash of broth or water during the final hour.
This recipe is flexible and easy to adjust to your preferred texture.