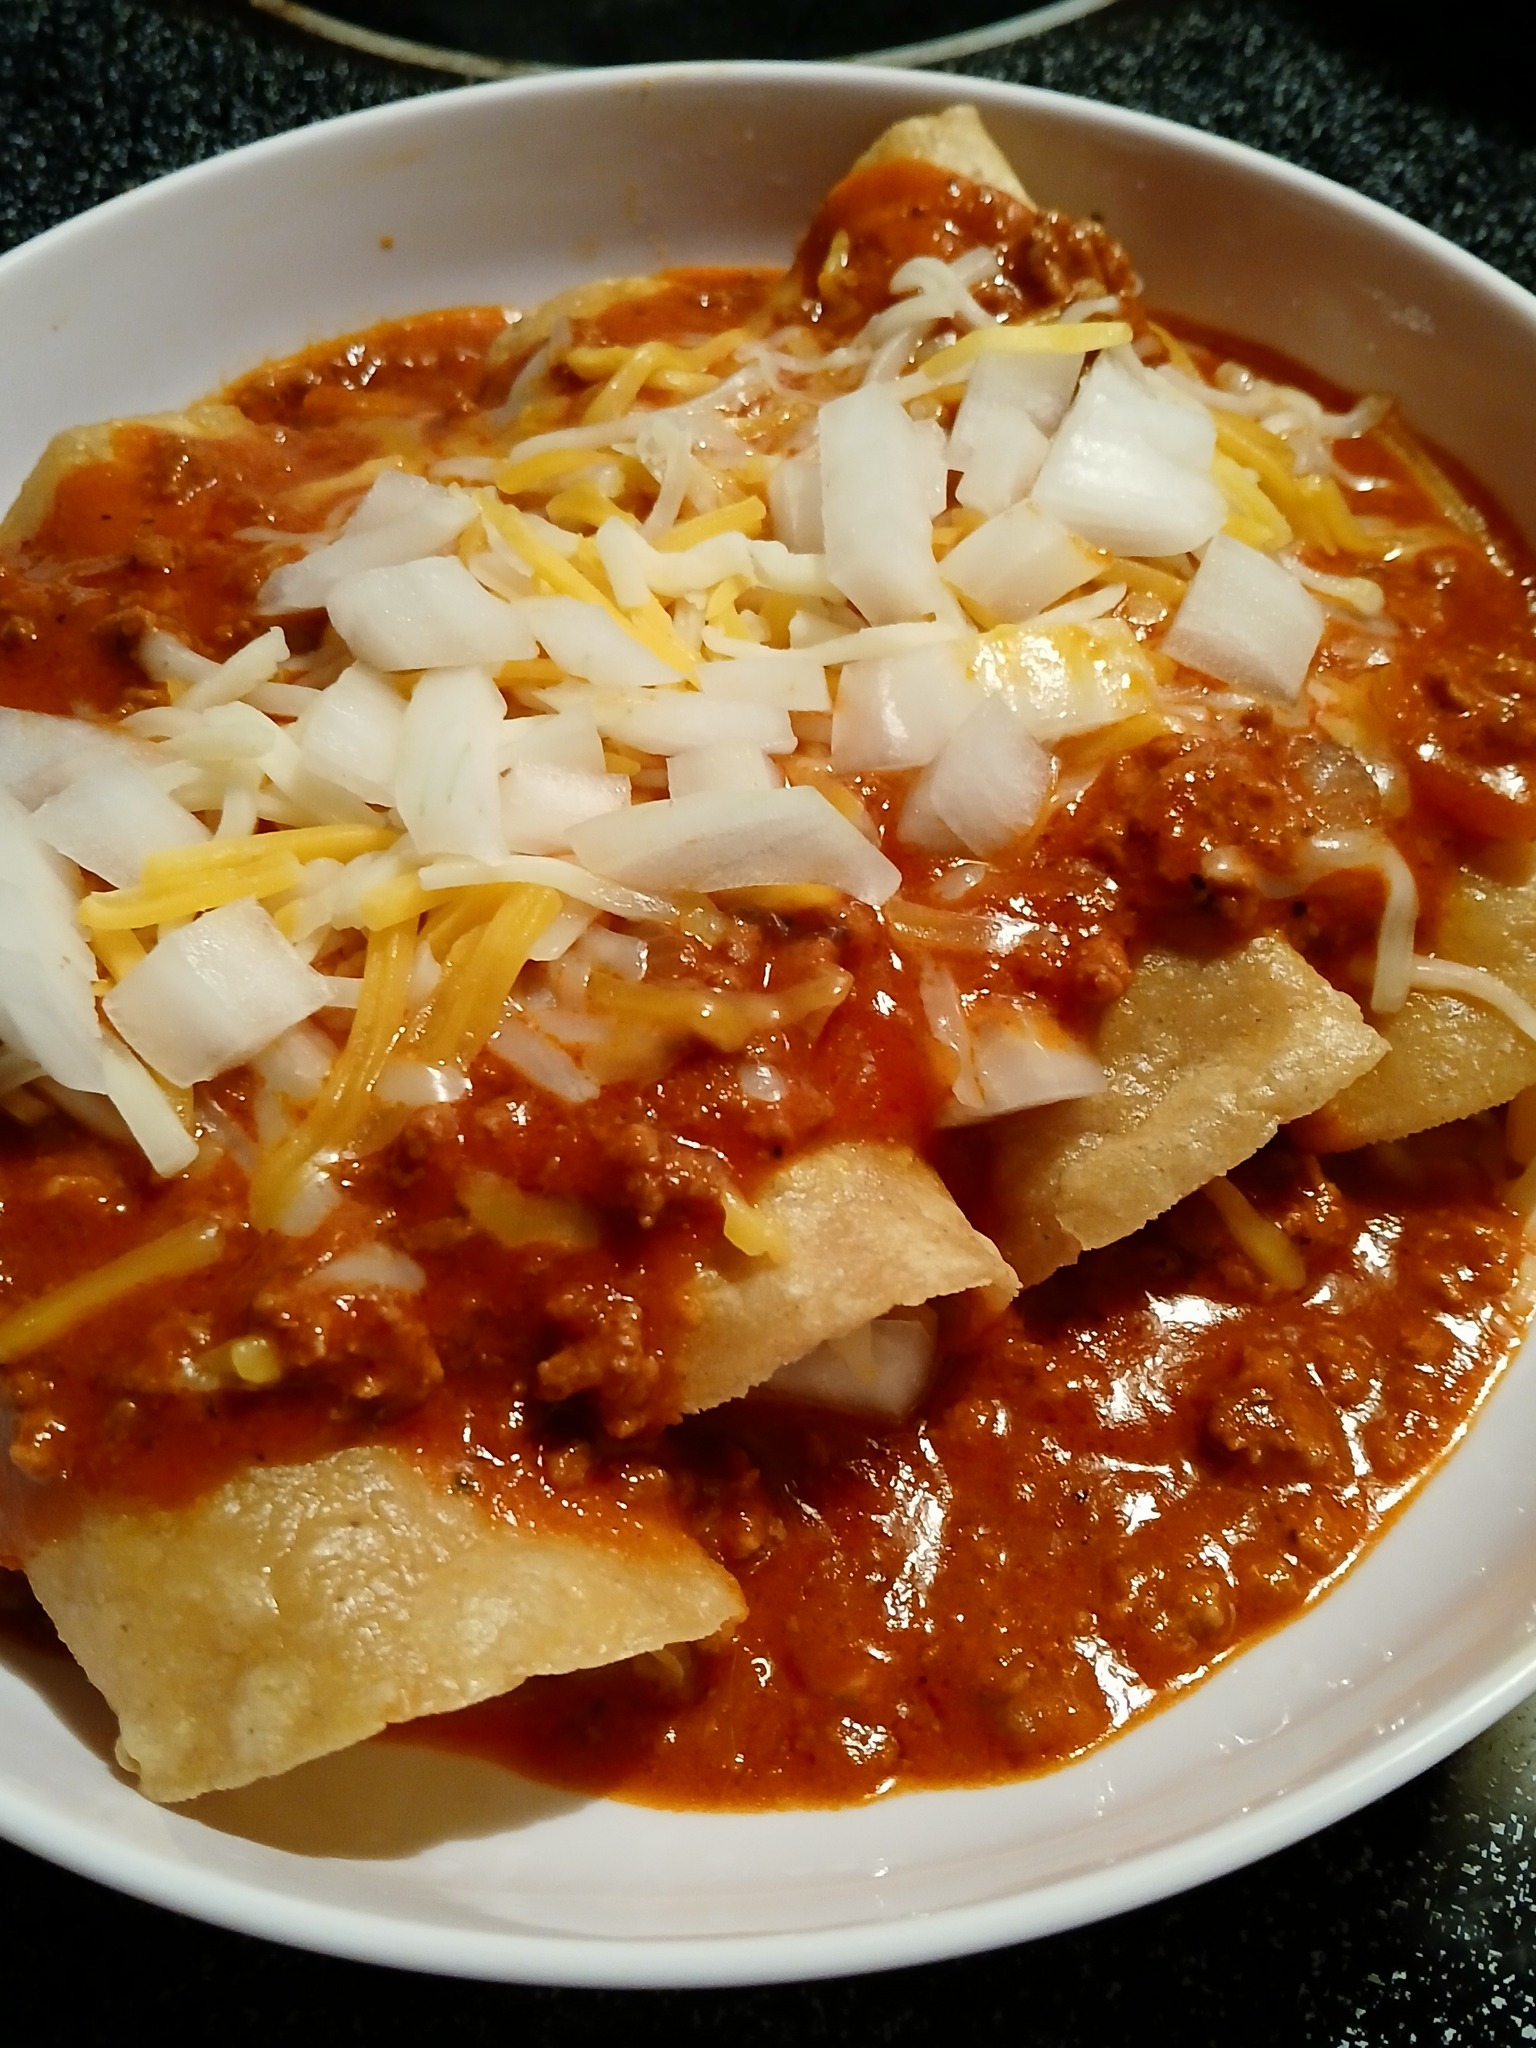
Rolled Red Chile Beef and Cheese Enchiladas
These Rolled Red Chile Beef and Cheese Enchiladas are a celebration of deep, earthy New Mexico flavors layered into a timeless comfort dish.
A rich red chile sauce—smoky, slightly tangy, and warmly spiced—coats soft corn tortillas filled with savory beef and crumbled queso fresco.
Baked until bubbling and finished with fresh garnishes, this recipe strikes a beautiful balance between rustic tradition and everyday indulgence, offering bold flavor without losing its soulful, home-cooked heart.
Why People Will Love Rolled Red Chile Beef and Cheese Enchiladas Recipe
Authentic New Mexico–style flavor
The dried red chiles create a sauce that’s earthy, smoky, and deeply traditional, offering a taste that feels rooted in regional cooking rather than shortcuts.
Homemade sauce with real depth
Roasted tomatoes, onions, and garlic build layers of flavor that jarred sauces can’t replicate, making every bite taste intentional and crafted.
Perfect balance of heat and richness
The chile sauce delivers warmth without overwhelming spice, while the beef and queso fresco soften and round out the flavors.
Soft, sauce-soaked tortillas
Dipping the tortillas in sauce before filling ensures tender enchiladas that never dry out in the oven.
Savory, satisfying filling
Lean ground beef seasoned simply with cumin and salt allows the chile sauce to remain the star while still delivering hearty comfort.
Fresh contrast from garnishes
Cilantro, scallions, red onion, and lime add brightness that cuts through the richness and keeps the dish feeling balanced.
Comfort food with cultural soul
This recipe feels nostalgic and grounding—warm, familiar, and deeply satisfying in a way only enchiladas can be.
Impressive yet approachable
While the flavors are complex, the method is straightforward, making this dish suitable for both special gatherings and relaxed family dinners.
Key Ingredients:
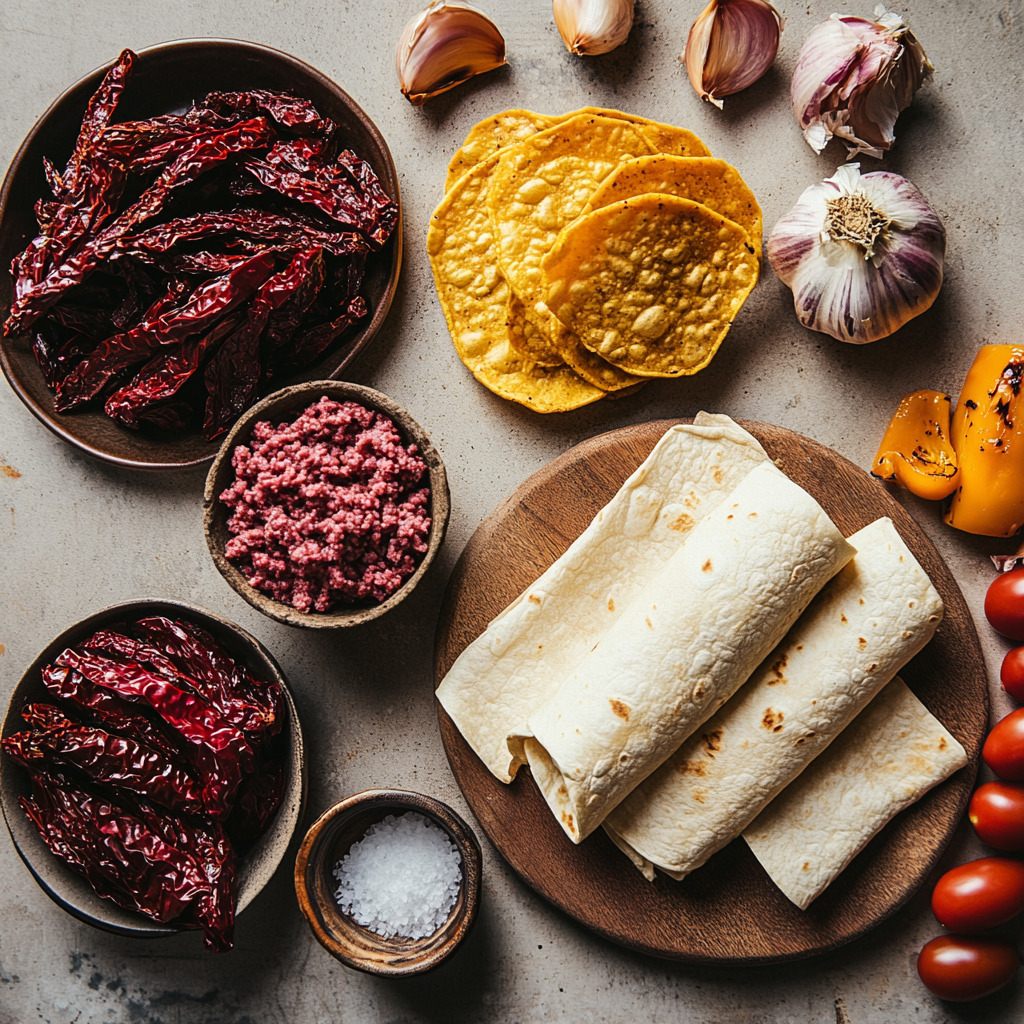
New Mexico Dried Red Chiles
The soul of the dish, these chiles bring an earthy, smoky warmth and a deep brick-red color that defines the sauce without overwhelming heat.
Plum Tomatoes
Roasted until lightly charred, they add natural sweetness and body to the sauce, balancing the intensity of the chiles.
Yellow Onion & Garlic
Broiled together, they create a savory backbone with subtle caramelized notes that deepen the sauce’s complexity.
Lean Ground Beef
Simply seasoned, the beef provides hearty, savory richness while allowing the red chile sauce to remain the star.
Corn Tortillas
Softened and dipped in sauce, corn tortillas absorb flavor beautifully and give the enchiladas their authentic texture.
Queso Fresco
Mild and slightly tangy, this crumbly cheese melts just enough to soften the filling while keeping the dish light and balanced.
Apple Cider Vinegar
A small but essential touch, it brightens the sauce and sharpens the chile flavors without adding noticeable acidity.
Ground Cumin
Used sparingly, cumin adds warm earthiness that ties the sauce and filling together seamlessly.
Expert Tips:
Choose quality dried chiles
Look for New Mexico chiles that are pliable and aromatic, not brittle or dusty. Fresh dried chiles produce a smoother, richer sauce with cleaner flavor.
Soak, don’t boil, the chiles
Pouring boiling water over the chiles and letting them soften gently preserves their nuanced flavor and prevents bitterness.
Reserve the soaking liquid
The chile soaking liquid carries flavor and color—using it in the blender adds depth while allowing you to control the sauce’s thickness.
Char the vegetables deeply but evenly
Broil the tomatoes, onion, and garlic until lightly blackened in spots. This caramelization adds smoky complexity without overpowering the chiles.
Blend until completely smooth
A fully smooth sauce coats tortillas evenly and prevents tearing. Blend longer than you think necessary for a restaurant-quality texture.
Season the beef simply
Keep the beef lightly seasoned so it supports the sauce instead of competing with it.
Dip tortillas quickly
Briefly coating tortillas in sauce softens them without making them soggy, making them easier to roll neatly.
Don’t overfill the enchiladas
A modest amount of filling ensures even baking and clean slices once served.
Bake uncovered
Leaving the dish uncovered allows excess moisture to evaporate and helps the cheese lightly brown.
Rest before serving
Letting the enchiladas rest for a few minutes helps the sauce settle and improves structure when serving.
Rolled Red Chile Beef and Cheese Enchiladas
Ingredients
For the Sauce:
2 cups boiling water
1 oz New Mexico dried chiles (about 5), stemmed and seeded
2 plum tomatoes, halved
1 small yellow onion, quartered
3 garlic cloves, unpeeled
1 tbsp apple cider vinegar
2 tsp kosher salt
½ tsp ground cumin
¼ tsp garlic powder
For the Enchiladas:
1 tbsp canola oil (plus more for greasing the dish)
1 lb lean ground beef (90% lean)
1 tsp kosher salt
1 tsp ground cumin
12 (5½-inch) corn tortillas, warmed
12 oz queso fresco, crumbled (about 3 cups)
For Garnish & Serving:
Fresh cilantro, sliced scallions, red onion rings
Lime wedges and sour cream
Instructions
Make the Red Chile Sauce:
Soften the chiles:
Pour boiling water over the dried chiles in a heatproof bowl. Let soak for about 20 minutes until soft. Drain, but reserve 1 cup of the soaking liquid.
Roast the veggies:
Preheat broiler to high with the oven rack 6 inches from the heat. Line a baking sheet with foil.
Place tomatoes (cut side down), onion, and unpeeled garlic cloves on the sheet. Broil for 8–10 minutes, until softened and charred. Remove garlic skins after roasting.
Blend the sauce:
Add the roasted tomatoes, onion, garlic, softened chiles, reserved chile soaking liquid, vinegar, salt, cumin, and garlic powder to a blender. Blend until smooth (about 1 minute). Set the sauce aside in a shallow bowl.
Assemble and Bake the Enchiladas:
Cook the beef:
Preheat oven to 350°F. Heat 1 tbsp oil in a skillet over medium-high. Add ground beef and cook for 6–7 minutes, until fully browned. Stir in salt and cumin. Remove from heat.
Fill the enchiladas:
Lightly grease a 9×13-inch baking dish. One at a time, dip tortillas in the sauce, letting the excess drip off. Place on a clean surface, fill with ¼ cup beef and 2 tbsp queso fresco, roll tightly, and place seam-side down in the baking dish. Repeat with remaining tortillas.
Top and bake:
Spoon about ½ cup of the sauce over the enchiladas and sprinkle with ½ cup queso fresco. Bake uncovered for 18–20 minutes, or until bubbling and golden.
Serve:
Garnish with cilantro, scallions, and red onion. Serve with lime wedges, sour cream, and the remaining sauce and queso fresco on the side.
Important Notes When Making Rolled Red Chile Beef and Cheese Enchiladas:
The sauce is the heart of the dish
This recipe is built around a traditional red chile sauce, so its flavor, texture, and balance directly determine the final result. Take your time with it.
Chile heat is naturally variable
New Mexico chiles can range from mild to medium heat. Taste the sauce before assembling and adjust with a splash of water or a pinch of salt if needed.
Texture should be silky, not thick
The sauce should flow easily off a spoon. A sauce that’s too thick won’t coat the tortillas evenly and can lead to dry enchiladas.
Corn tortillas must be warmed and softened
Cold tortillas tear easily. Brief warming or dipping in warm sauce ensures flexibility and clean rolls.
Cheese is meant to complement, not dominate
Queso fresco adds creaminess without heaviness. Using too much cheese can mask the chile flavor.
Simple seasoning is intentional
Minimal seasoning in the beef allows the red chile sauce to remain the star of the dish.
This dish benefits from resting
A short rest after baking lets the sauce settle and improves structure and flavor balance.
Best enjoyed fresh, but flavors deepen overnight
While best the day it’s made, leftovers develop deeper chile flavor when reheated gently.
How to Enjoy Rolled Red Chile Beef and Cheese Enchiladas After Cooking
Let the enchiladas rest briefly
Allow the dish to rest for 5–10 minutes after baking. This helps the sauce settle, the cheese firm slightly, and the enchiladas hold their shape when served.
Serve warm, not piping hot
These enchiladas are best enjoyed warm, when the red chile sauce is silky and the flavors are fully developed without overwhelming heat.
Finish with fresh garnishes
Add sliced scallions, fresh cilantro, and red onion rings just before serving to introduce brightness, crunch, and contrast to the rich sauce.
Add acidity at the table
A squeeze of fresh lime over each portion sharpens the chile flavor and brings balance to the savory beef and cheese.
Pair with cooling elements
Serve alongside sour cream, crema, or a light cabbage slaw to soften the warmth of the chile sauce and add textural contrast.
Savor the layers
Take time to enjoy how the tender tortillas, savory beef, mild queso fresco, and deep red chile sauce come together in each bite.
Serve family-style for best experience
Present the enchiladas straight from the baking dish, letting everyone customize with extra sauce, cheese, or garnishes.
Enjoy leftovers gently reheated
Reheat covered in the oven or microwave with a spoonful of sauce to maintain moisture and prevent drying.
Turn leftovers into something new
Chop leftover enchiladas and serve over rice, wrap in warm tortillas, or layer into a red chile enchilada bowl.
Enjoy slowly and intentionally
This is a dish meant to be savored—deeply comforting, bold yet balanced, and best enjoyed unrushed.
Nutrition Information
For Rolled Red Chile Beef and Cheese Enchiladas
(Approximate values per 1 enchilada, assuming the recipe makes 6 servings.)
Calories: 360 kcal | Total Fat: 17.4 g | Saturated Fat: 7.8 g | Monounsaturated Fat: 6.1 g | Polyunsaturated Fat: 2.1 g | Cholesterol: 75 mg | Sodium: 520–650 mg (depending on cheese and added salt) | Total Carbohydrates: 30.6 g | Dietary Fiber: 5.2 g | Sugars: 4.1 g | Protein: 21.8 g
Frequently Asked Questions:
Can I make the red chile sauce ahead of time?
Yes. The sauce can be made up to 3 days in advance and stored in the refrigerator. Reheat gently before using, adding a splash of water or broth if it thickens.
Are New Mexico dried chiles spicy?
They’re typically mild to medium in heat with deep, earthy flavor. If you’re sensitive to spice, remove all seeds and taste the sauce before assembling.
Can I substitute another cheese for queso fresco?
Yes. Cotija, mild feta, or a light sprinkle of Monterey Jack can work, but queso fresco keeps the dish balanced and prevents it from becoming overly rich.
Why dip the tortillas in sauce before filling?
Dipping softens the tortillas, prevents cracking, and infuses flavor into every layer, resulting in tender enchiladas that bake evenly.
How should leftovers be stored and reheated?
Store leftovers covered in the refrigerator for up to 3 days. Reheat gently in the oven or microwave with a bit of extra sauce to keep them moist.
How smooth should the red chile sauce be?
The sauce should be completely smooth and pourable, similar to a thin gravy. If it feels thick or textured, blend longer and add a small amount of the reserved chile soaking liquid.
Do I need to strain the chile sauce after blending?
Straining isn’t necessary if the sauce is blended thoroughly. However, if your blender isn’t very powerful, straining can help achieve a silkier texture.
Should the tortillas be hot or just warm before dipping?
They should be warm and pliable, not hot. Warm tortillas absorb the sauce better and roll without tearing.
Can I cook the beef directly in the chile sauce?
It’s best to cook the beef separately. Browning it first builds flavor and prevents excess grease from thinning the sauce.
How do I keep the enchiladas from becoming soggy?
Use a light coating of sauce on the tortillas, don’t overfill, and bake uncovered so excess moisture can evaporate.