Chili Con Queso
Chili Con Queso is the ultimate fusion of comfort and bold flavor—warm, creamy, and unapologetically indulgent. This beloved Tex-Mex classic transforms simple ingredients into a bubbling skillet of molten cheese layered with spice, heat, and richness.
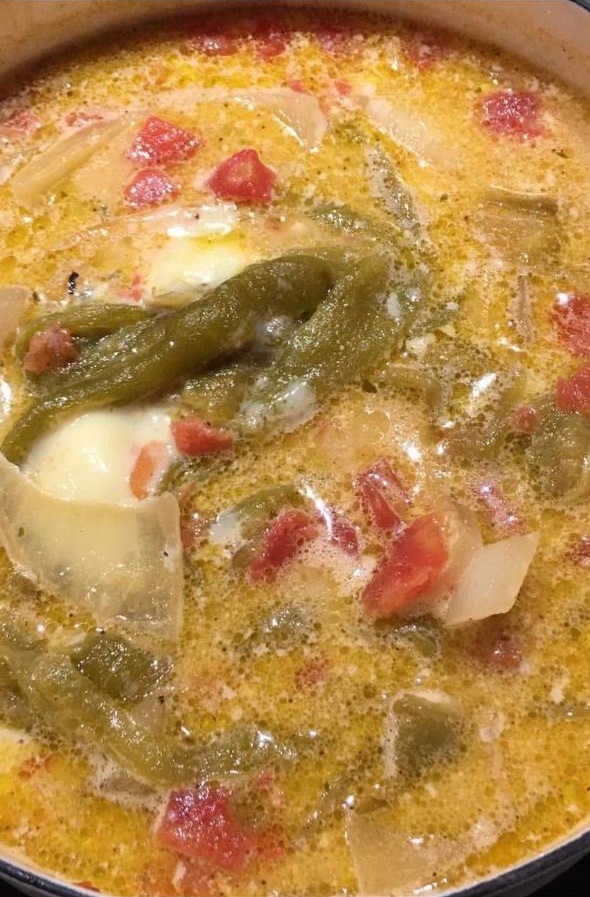
The savory ground beef forms a hearty foundation, while fire-roasted tomatoes, green chiles, and jalapeño bring smokiness and a lively kick that balances the creaminess of melted cheese.
It’s more than just a dip—it’s a centerpiece for gatherings, a dish designed for sharing. Whether scooped up with tortilla chips during game night or served as part of a festive spread, Chili Con Queso is a recipe that guarantees comfort, conversation, and satisfaction in every bite. It’s rustic, vibrant, and irresistibly crowd-pleasing—the kind of dish that disappears as quickly as it hits the table.
Why People Will Love Chili Con Queso:
Creamy indulgence – A luscious blend of Velveeta and Monterey Jack creates a velvety, molten texture that clings perfectly to every tortilla chip.
Layers of bold flavor – Fire-roasted tomatoes, green chiles, and jalapeño add smokiness, heat, and brightness, balancing the richness of the cheese.
Hearty and satisfying – Ground beef transforms this dip into something more substantial, making it a dish that can stand alone or be shared at gatherings.
Irresistible for sharing – Served bubbling hot in a skillet, it’s the kind of communal food that draws people together around the table.
Perfectly versatile – Beyond chips, it pairs beautifully with warm tortillas, drizzled over nachos, spooned into tacos, or layered in burritos.
A true crowd-pleaser – Its combination of spice, cream, and comfort makes it universally appealing, whether for game nights, parties, or family dinners.
Tex-Mex tradition at its best – A dish rooted in bold, rustic flavors that deliver both comfort and festivity in every bite.
Key Ingredient:
Ground beef – Provides a hearty, savory base that turns this dip from a simple appetizer into a filling, meal-worthy dish.
Chili powder – Infuses the beef with warmth and earthy spice, giving depth right from the first bite.
Red onion and garlic – The aromatic backbone, adding sweetness, sharpness, and fragrance that enriches the entire dip.
Green chiles and jalapeño – Bring brightness and heat, creating layers of spice that balance the richness of melted cheese.
Fire-roasted tomatoes – Add smokiness and acidity, cutting through the creaminess with a charred, tangy flavor.
Evaporated milk – Keeps the cheese sauce smooth and silky, preventing clumps while adding richness.
Velveeta and Monterey Jack cheese – The star duo: Velveeta ensures creaminess, while Monterey Jack melts into a gooey stretch with a subtle sharpness.
Fresh cilantro – A burst of herbal freshness at the finish, lifting the dish and adding contrast to the bold, cheesy richness.
Expert Tips:
Brown the beef properly – Let the ground beef sear until lightly caramelized before breaking it apart completely. This adds a richer, deeper flavor compared to just cooking it until gray.
Bloom the spices – Stir the chili powder into the beef as it cooks so the heat releases its essential oils, intensifying the flavor throughout the dip.
Control the heat level – Adjust the jalapeño and green chiles to your spice preference. For extra kick, keep some seeds in; for a milder version, remove them fully or swap for mild green chiles only.
Prevent grainy cheese – Add the evaporated milk before melting the cheese. Its proteins stabilize the sauce, keeping the texture smooth and creamy instead of clumpy.
Layer the cheeses smartly – Velveeta provides the base creaminess, while Monterey Jack adds real cheese flavor and stretch. Stir most of the Jack cheese into the sauce and reserve some for broiling on top to achieve that bubbly, golden crust.
Broil with care – When finishing under the broiler, watch closely. Cheese goes from bubbly to burnt in seconds, so pull it as soon as the top is browned and glossy.
Serve hot, keep warm – Queso thickens quickly as it cools. Serve immediately from a cast iron skillet or keep warm on low heat in a slow cooker or warming dish for gatherings.
Garnish for freshness – A sprinkle of fresh cilantro (or even green onions) right before serving balances the richness and gives the dip a vibrant finish.
Chili Con Queso
Ingredients
1 tablespoon olive oil
½ pound ground beef (extra lean)
1 teaspoon chili powder
1 small red onion (diced)
1 clove garlic (minced)
4 ounce green chiles ((1 can))
1 jalapeno (fresh, seeded and chopped)
14 ounce fire roasted tomatoes ((1 can))
1 cup evaporated milk
1 cup velveeta (cubed)
2½ cups monterery jack cheese (shredded)
1 tablespoon cilantro (fresh, chopped)
Instructions
Step 1:
Heat the olive oil in a cast iron skillet, or oven safe skillet over medium-high heat.
Add the ground beef to the skillet, season it with the chili powder, and cook for about 5 minutes until no longer pink, breaking it up as you go along.
Step 2:
Stir in the red onion and garlic and cook for 2 more minutes or until the onion softens and becomes translucent.
Step 3:
Add the green chiles, jalapeno, fire roasted tomatoes and stir.
Bring to a simmer, then turn down the heat to medium low.
Add the evaporated milk and velveeta and cook for 2 more minutes or until the velveeta melts.
Stir in 2 cups of the jack cheese and cook for another minute until it melts.
Step 4:
Turn off the heat.
Sprinkle the remaining jack cheese over the top of the dip and place the skillet over the broiler for about 5 minutes or until browned and bubbly.
Watch it so it doesn’t burn.
Step 5:
Garnish with fresh cilantro and serve with tortilla chips.
Important Notes When Making Chili Con Queso:
Cheese selection is key – Velveeta ensures the signature creamy consistency, while Monterey Jack provides authentic flavor and stretch. Skipping one changes the balance of texture and taste.
Use evaporated milk, not regular milk – Regular milk can curdle or make the sauce thinner, while evaporated milk creates a stable, silky base that holds up to the heat.
Balance the heat to your crowd – Chili Con Queso is meant to be shared. If serving a mixed group, keep the spice milder, then set out hot sauce or jalapeños on the side for those who want extra heat.
Broiler time is brief – The bubbling, browned top is what makes this queso irresistible, but it can burn in seconds. Stay by the oven and pull it out the moment the cheese is golden.
Serve immediately – This dip thickens as it cools. To maintain the luscious texture, keep it in a warm skillet, a fondue pot, or even a slow cooker on the warm setting.
Stir before serving – After broiling, the cheese layer on top can slightly separate. A gentle stir ensures every scoop is creamy and balanced.
Leftovers need gentle reheating – Reheat slowly over low heat, adding a splash of milk if needed to loosen the texture. Microwaving on high can cause separation.
Pair thoughtfully – Tortilla chips are classic, but this queso also shines poured over nachos, stuffed into quesadillas, spooned on tacos, or used as a topping for baked potatoes.
How To Enjoy Chili Con Queso After Cooking:
Let it rest briefly – After broiling, give the skillet 2–3 minutes to settle. This allows the bubbling cheese to stabilize, so every scoop is rich without being too runny.
Serve it sizzling hot – Queso is at its best when molten and creamy. Bring it to the table in the same cast iron or oven-safe skillet, letting the rustic presentation enhance the communal experience.
Pair with the classics – Serve alongside warm tortilla chips for dipping, but also try spooning it over nachos, tacos, burritos, or even roasted vegetables for a luxurious twist.
Offer toppings at the table – Set out extras like diced tomatoes, jalapeños, fresh cilantro, green onions, or sour cream so guests can customize each bite. This keeps the dip exciting and versatile.
Enjoy as a centerpiece – Place it at the center of the table and encourage everyone to dig in. Queso is about sharing—its warm, gooey character makes it the heart of any gathering.
Keep it warm for longer enjoyment – If serving over time (like at a party or game day), transfer to a slow cooker on the “warm” setting or use a warming tray to prevent thickening.
Reinvent leftovers – If you’re lucky enough to have some left, repurpose it: drizzle over baked potatoes, spread inside quesadillas, stir into scrambled eggs, or use as a sauce for pasta or burgers.
Savor slowly – Take time to enjoy the contrast of creamy cheese, smoky tomatoes, and spicy chiles in each bite. It’s not just a dip—it’s a celebration of bold Tex-Mex comfort.
Nutrition Information
For Chili Con Queso (per serving, based on about 10 servings):
Calories: 285 kcal | Total Fat: 20 g | Saturated Fat: 11 g | Monounsaturated Fat: 6 g | Polyunsaturated Fat: 1 g | Cholesterol: 60 mg | Sodium: 750–900 mg (depending on cheese and canned ingredients) | Total Carbohydrates: 9 g | Dietary Fiber: 2 g | Sugars: 3 g | Protein: 18 g
Frequently Asked Questions:
Can I make Chili Con Queso ahead of time?
Yes, but it’s best enjoyed fresh. You can prepare the beef and vegetable mixture a day ahead, then reheat and add the cheeses just before serving to ensure a smooth, creamy texture.
How do I keep the queso from becoming too thick as it cools?
Serve it in a cast-iron skillet or transfer it to a slow cooker on the warm setting. If it thickens, stir in a splash of milk or evaporated milk to restore creaminess.
Can I make this recipe vegetarian?
Absolutely. Simply omit the ground beef and replace it with extra beans, roasted vegetables, or even soy crumbles. The flavors of the cheese, tomatoes, and chiles still shine beautifully.
What’s the best way to reheat leftovers?
Reheat gently on the stovetop over low heat, stirring often, and add a little milk if needed to loosen the sauce. Avoid high heat or microwaving too long, as cheese can separate and become grainy.
Can I adjust the spice level?
Yes. For milder queso, remove the seeds from the jalapeño and use mild green chiles. For more heat, keep some seeds, add extra jalapeños, or stir in cayenne or hot sauce to taste.
Why do I need to add evaporated milk before the cheese?
Evaporated milk stabilizes the cheese sauce, preventing it from curdling or becoming grainy. It creates a smooth, velvety texture that holds up under heat.
Should I cook the beef and vegetables separately or together?
Cook them together. Browning the beef alongside onions and peppers allows the flavors to mingle from the start, creating a more flavorful base for the queso.
Why use both Velveeta and Monterey Jack?
Velveeta guarantees creamy, melt-in-your-mouth texture, while Monterey Jack adds authentic cheese flavor and gooey stretch. Together they create a balance of texture and taste that one cheese alone can’t achieve.
How do I stop the cheese from separating under the broiler?
Broil just long enough to brown the top—usually 3–5 minutes. Keep a close eye, as cheese can go from bubbly to burnt quickly. Overheating causes separation and oiliness.
Can I double the recipe for a party?
Yes, but use a larger skillet or bake in two dishes to ensure even heating. Overcrowding can cause uneven melting and prevent the cheese from achieving that smooth, creamy consistency.